Overview: This article shows you how to quickly retrieve lost data from your Samsung A53.
When we use our Samsung A53, we enjoy cutting-edge technology. But when we try to find some data on our work, it may have been deleted or lost over time. Don't worry, follow the instructions below and you will be able to retrieve the lost data. Before I tell you how to get it back, let me first introduce the reasons why you lost your phone data, so that you can also avoid losing it again. Sometimes we accidentally delete a file in the middle of a busy day, sometimes it's because of a virus, or more often it's because of a system update.
Methods Outline:
Method 1: Using backup files to recover lost data from Samsung A53
Method 2: Retrieve Samsung A53 Photos/Data/Messages/Videos/Contacts directly without backing up data
Method 3: Mobile Transfer to recover data to Samsung A53
Mehtod 4: Data recovery to Samsung A53 via My files
Mehtod 5: Recover Samsung A53 Photos/Data/Messages/Videos/Contacts from your phone using Samsung Cloud
Mehtod 6: Use Google Drive to recover data from Samsung A53
Method 1: Using backup files to recover lost data from Samsung A53
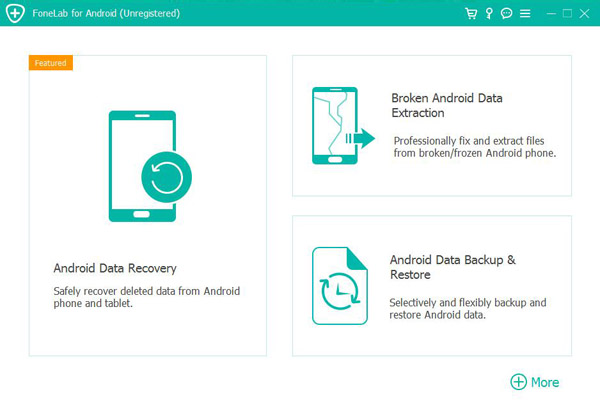
Assuming you have a backup of your data, then I recommend the software Android Data Recovery.
Android Data Recovery is a simple transfer software with clean pages and easy to use.Android Data Recovery can recover deleted or lost contacts, text messages, videos, photos, audio, documents, Whatsapp messages, call logs, Microsoft Word documents, Excel worksheets, PowerPoint presentations, PDF documents and more. PowerPoint presentations, PDF documents and more. Not only does it offer a comprehensive range of transferable data types, Android Data Recovery also supports all Android devices such as: Samsung, LG, HTC, Huawei, Sony, ZTE, Google, Motorola, Acer and many more. It has powerful features to recover data from screen corruption, water damage, black screen, locked screen, restore factory settings, OS update or upgrade Android smartphones and repair bricked Android devices without losing any data.


Step 1: Download the software
Download Android Data Recovery from the proper sources, open it after installation and select "Android Data Backup and Recovery" from the home page.
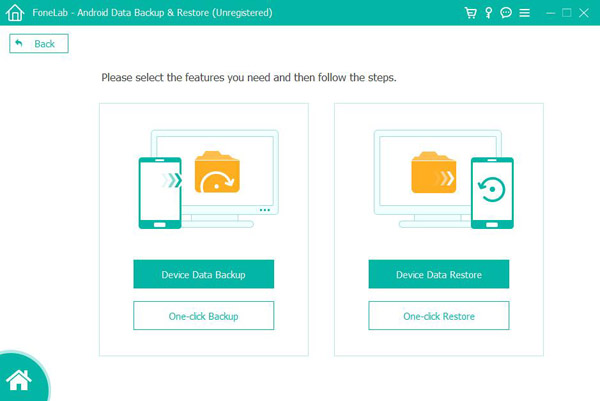
Step 2: Mode selection
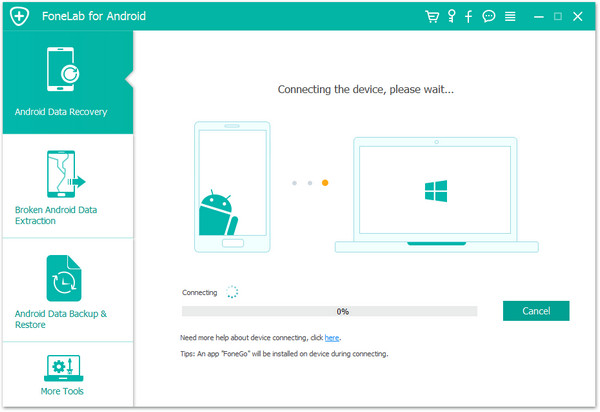
Connect your Samsung A53 to your computer using the USB cable. Select any of the four modes on the next page and proceed to the next step.
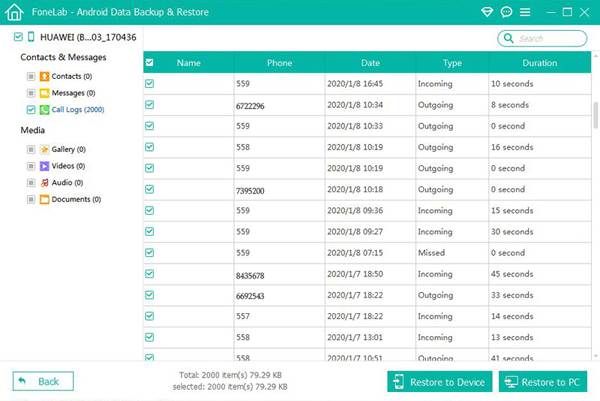
Step 3: Category selection
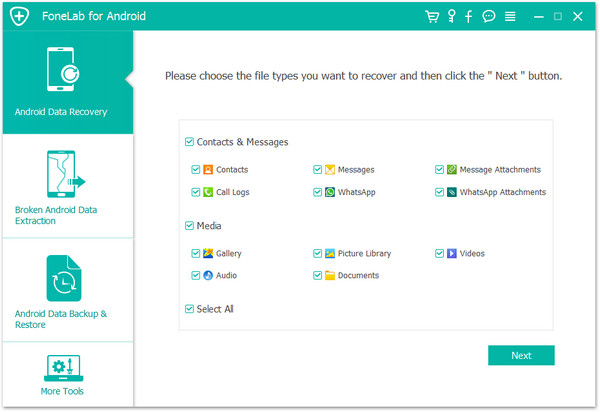
Select the type of files that have been backed up on the displayed page and click "Start", the software will automatically extract the recoverable data, please be patient.

Step 4: Transfer the data
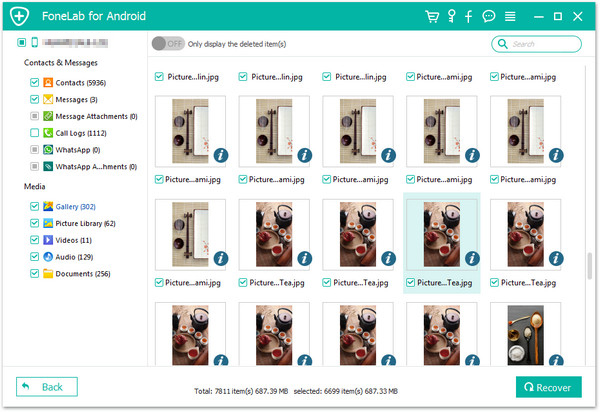
Once the data has been extracted it will be displayed on the main page where you can preview the contents. Once you have confirmed that the files you want to recover have been selected, click on "Recover to Device".
Method 2: Retrieve Samsung A53 Photos/Data/Messages/Videos/Contacts directly without backing up data
With the help of Android Data Recovery, you can retrieve your data even without backup files.
Step 1: Open the software
Run the software Android Data Recovery and select the mode we need "Android Data Recovery".
Step 2: Connect your phone
Follow the software prompts to connect your phone to the computer using the USB cable and successfully turn on debugging. Once the page shows that the connection is successful, you can proceed to the next step.
Step 3: Scan the file
Check the type of files to be recovered in the displayed file types and click on "Next", the software will automatically scan them.
Step 4: Recover data from Samsung Galaxy A53
Select the files you want to recover from the scan results and click on "Recover". Once the transfer is complete, you can view the data recovery on your Samsung A53.
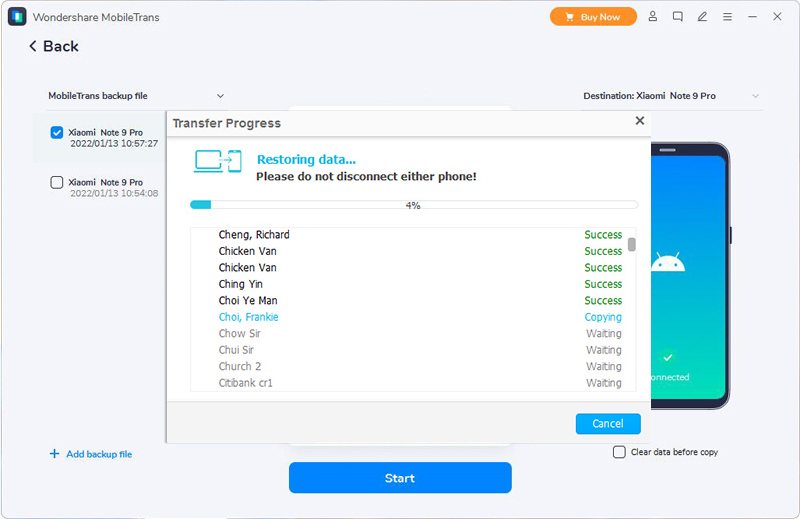
Method 3: Mobile Transfer to recover data to Samsung A53
The software Mobile Transfer can also help us to retransfer backup files back to the phone.
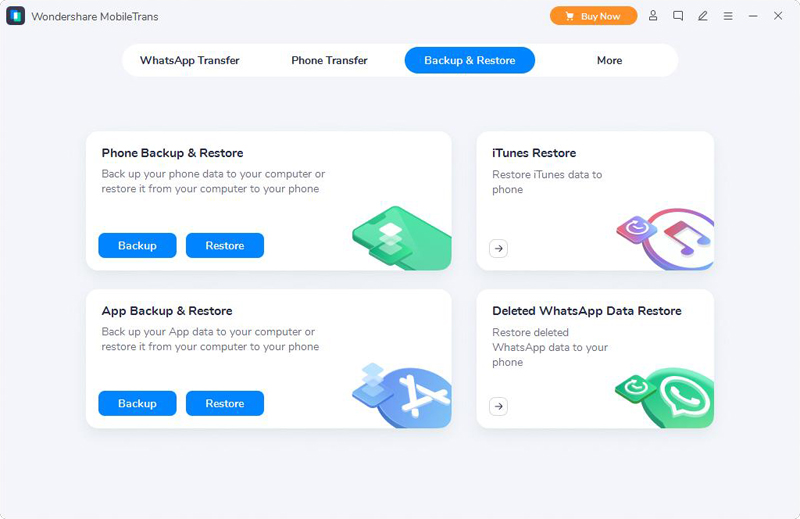
Mobile Transfer is an all-in-one data management software that is divided into four main sections. Phone to Phone Transfer, Restore from Backup, Backup Phone and Delete Old Phone. As a core feature, the 'Phone to Phone Transfer' block allows you to easily transfer all your data between different smartphones, including any Android and iOS devices on the market. If you have previously backed up your phone data using this or other data backup software such as Samsung Kies, iTunes, iCloud etc., you can use the 'Restore from backup' block to complete the data extraction and synchronisation to your new phone. There is no doubt that the "Backup your phone" function block is used to back up your phone data. As for the "Erase your old phone" function block, it is used to completely erase all the data on your phone. After wiping, even the most professional data recovery software will not be able to recover the wiped data. Therefore, please use this function with caution.
Step 1: Download and install the software Mobile Transfer
Download Mobile Transfer from the official website and select "Backup and Recovery" at the top of the software, then "Phone Backup and Recovery" and finally "Recover Select "Recover".
Step 2: Debugging USB
Connect your phone to your computer with a USB cable and turn on the USB debugging switch according to the prompts given by the software. Once successfully connected, proceed to the next step.
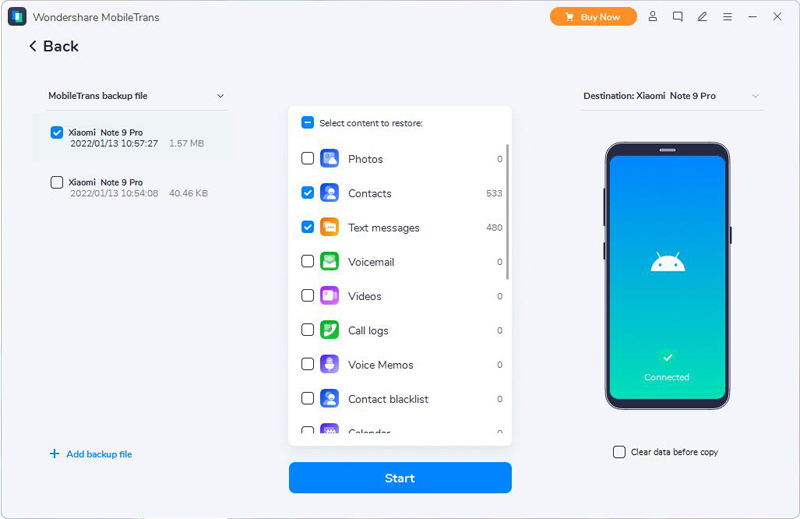
Step 3: Recover files
Select the files to be recovered, click "Start" and wait for the transfer to finish.
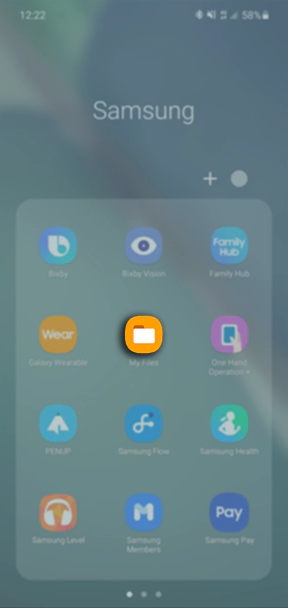
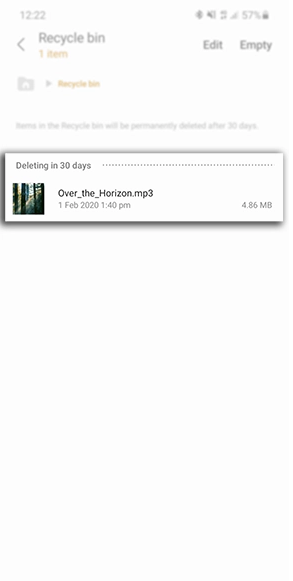
Method 4: Data recovery to Samsung A53 via My files
A convenient and safe method is to use the program that comes with the phone.
Step 1: Open "My files"
Take out your Samsung A53 phone and open My Documents.
Step 2: Open the Recycle Bin
Click on the menu button in the top right corner of the phone page and select the "Recycle Bin" option.
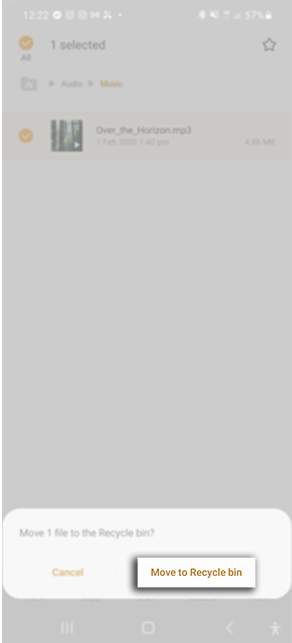
Step 3: Select a file
Click and long press on the file you want to recover and select the "Recover" button from the options that appear.
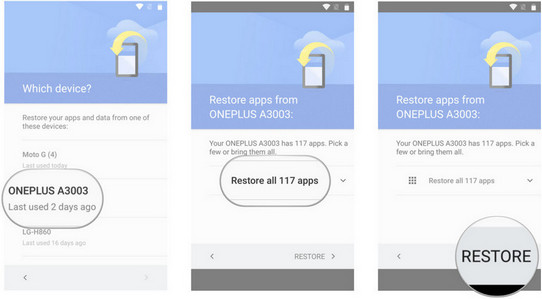
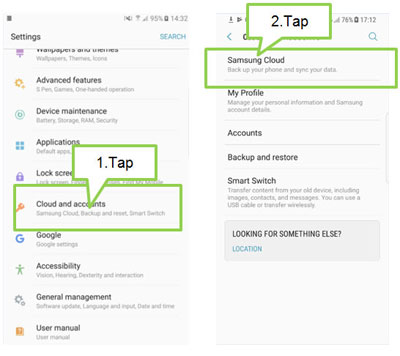
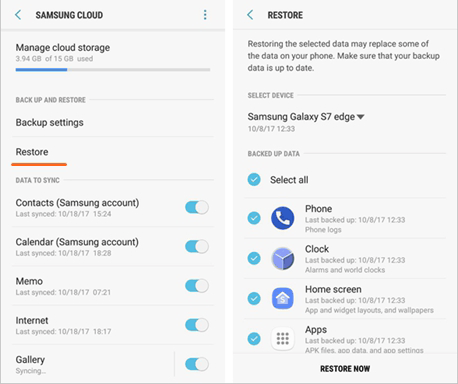
Method 5: Recover Samsung A53 Photos/Data/Messages/Videos/Contacts from your phone using Samsung Cloud
This is an official Samsung mobile application that helps customers recover their data.
Samsung Cloud is the personal cloud storage service of the Samsung Group of companies, which allows you to store various other data such as photos, text messages and contact records via the app or the web.
Step 1: Backup and restore
On the Samsung A53, find 'Settings', then select 'Cloud & Accounts', then 'Backup & Restore'. On the next page, select the "Restore" button and then select the type of data you want to recover.
Step 2: Recovering data
Once you have selected the file type you want to recover, click on "Recover Now" to restore the files to your Samsung A53.
Method 6: Use Google Drive to recover data from Samsung A53
If you have ever backed up your files on Google Drive, then recovering your data is easy.
Google Drive is an online cloud storage service launched by Google Inc. Through this service, users can get 15GB of free storage space. At the same time, users can pay for more storage if they need more. The Google Drive service will be available as a local client and as a web interface, similar to that of Google Docs. It will be available for Google Apps customers, with a special domain name. In addition, Google will provide APIs to third parties to allow people to save content to Google Drive from other applications.
Step 1: Sign in to your account
You can sign in to your account directly from your mobile app, or from your browser.
Step 2: File types
Check the data you want to restore in the data you have backed up, select the correct type and continue to the next step.
Step 3: Data Synchronisation
Check the data you want to recover and click "Recover". You can view the data recovery on your Samsung A53 after the file transfer.