4 best ways to recover deleted and lost data from vivo X60/vivo X60 Pro/vivo X60 Pro+, no matter with or without backup.
Is it possible to recover the deleted or lost data from vivo X60, vivo X60 Pro or vivo X60 Pro+? Is there a simple but safe method to restore deleted or lost data from vivo X60/X60 Pro/X60 Pro+? There is no doubt that the answer is yes, and this article will give four simple, effective and safe methods, please wait and see.
The professional imaging flagship mobile phone, the vivo X60 series, is officially released, which is the thinnest 5G smartphone ever made by vivo. The members of the vivo X60 series are vivo X60, vivo X60 Pro, and vivo X60 Pro+. vivo X60 and Vivo X60 Pro are equipped with Samsung's Exynos 1080 flagship chip with a 5nm process process, which has strong performance strength, and Vivo X60 Pro+ will be equipped with Snapdragon 888 top processor. The vivo X60 series are all equipped with OriginOS, the second-generation micro-head, and Zeiss optical lens. In terms of storage combination, the vivo X60 series provides three configuration versions: 8GB+128GB, 8GB+256GB, and 12GB+256GB.
The vivo X60 series, which combines exquisite design, excellent configuration and strong performance, has undoubtedly attracted the attention of users all over the world, and you are no exception, right? It is conceivable that it will bring you an unprecedented user experience. However, the more you rely on the vivo X60 series, the more data will be stored in the phone, which greatly increases the risk of data loss. We are not alarmist, unless you have mastered the method of how to recover lost data on vivo X60/X60 Pro/X60 Pro+ safely and effectively. If not, please rest assured, this article will help you out.
- Part 1. Restore Data from vivoCloud to vivo X60/X60 Pro/X60 Pro+
- Part 2. Directly Restore Data from vivo X60/X60 Pro/X60 Pro+ without Backup (Recommonded)
- Part 3. Restore Data from Backup to vivo X60/X60 Pro/X60 Pro+
- Part 4. Retrieve Data from Previous Phone to vivo X60/X60 Pro/X60 Pro+
- Part 5. Back Up Data from vivo X60/X60 Pro/X60 Pro+ to Computer
Part 1. Restore Data from vivoCloud to vivo X60/X60 Pro/X60 Pro+
vivoCloud service is an application developed by Vivo to provide data management and mobile phone positioning for its mobile phone users. Currently, it supports backing up more than 20 system data such as photos, videos, music, documents, contacts, text messages, browser bookmarks, notes, schedules, and applications. If you've ever backed up your vivo X60/X60 Pro/X60 Pro+ to vivoCloud, then you can easily restore it.
Note: Before using this method, please sign in to the vivoCloud account that you were used to backed up on your vivo X60/X60 Pro/X60 Pro+, and make sure that your phone’s battery and internal storage space are sufficient.
1. Unlock your vivo X60/X60 Pro/X60 Pro+, connect your phone to a stable WIFI network.
2. Open your “Settings” app, swipe down the screen to find “vivoCloud” and tap on it.
3. After entering to vivoCloud, all the backup contents will be listed, such as contacts, SMS, web bookmarks, notes, blacklist and so on. Pleaes tap into the corresponding item as you like and click on "Restore" inside of that to restore the select data from vivoCloud to your vivo X60/X60 Pro/X60 Pro+.
Part 2. Directly Restore Data from vivo X60/X60 Pro/X60 Pro+ without Backup
According to a previous survey, out of 100 respondents, as many as 88 mobile phone users do not have the habit of data backup, so we do not expect that when data loss occurs, you have a backup that can be used for recovery . Fortunately, you still have Android Data Recovery you can rely on.
Android Data Recovery is a such powerful data recovery software that provides excellent data recovery services for thousands of users every day. It does not require you to master any technical knowledge, and does not require you to have any backup files, no matter which brand or model of Android smartphone or tablet you are using, with the help of this software, you can directly recover deleted and lost data including contacts, text messages, WhatsApp messages, audio, photos, call logs, videos, documents and more from any Android device, of course including your vivo X60, vivo X60 Pro and vivo X60 Pro+.


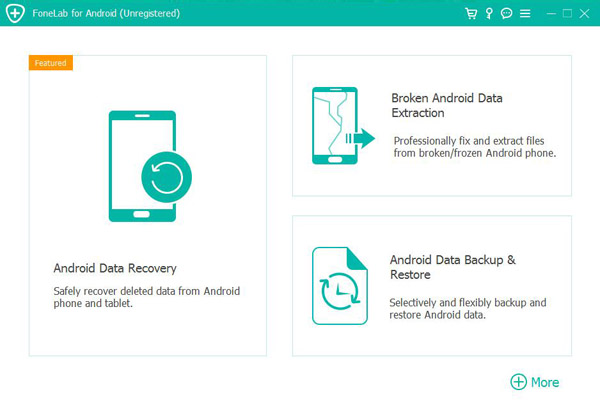
Step 1. Download and install the corresponding version of Android Data Recovery on your computer, then run it and click on "Android Data Recovery".
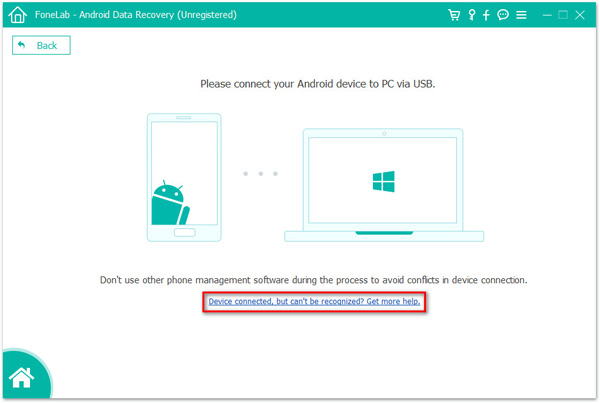
Step 2. Connect your vivo X60, vivo X60 Pro or vivo X60 Pro+ to computer by using a USB cable. The progress of the connection is displayed on the interface. If the connection is successful, your device will appear on the interface. If the connection fails, you will be notified. Please follow the instructions given to eliminate the factors that caused the connection failure.
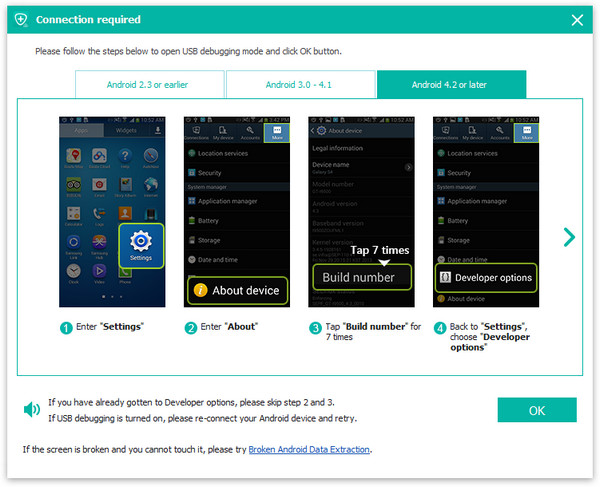
Please ensure that you've enabled the USB debugging on your phone's screen, and click "OK" to go on.
Step 3. When your device is successfully connected, you need to choose the file types that you wish to scan and restore, then click on "Next" to start the standard scanning process.
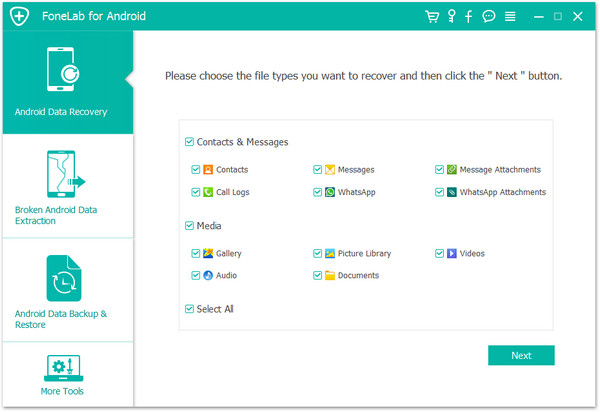
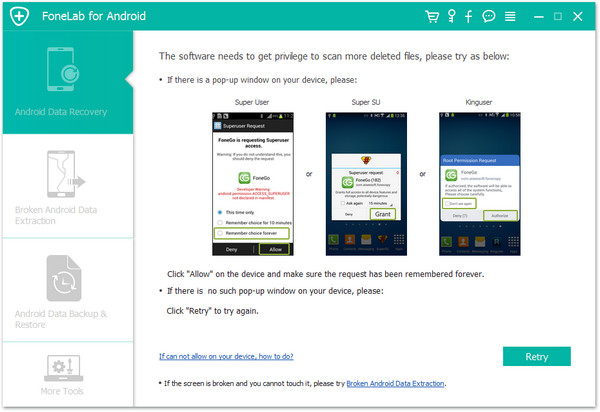
Please do not leave the software interface, because during the scanning process, the program will need your cooperation and authorization to obtain more scanning permissions.
Step 4. Wait for the scan is complete, all scan results will be displayed on the interface, including the existing and deleted. You can preview them one by one, then select the data you need and click "Recover" to restore them.
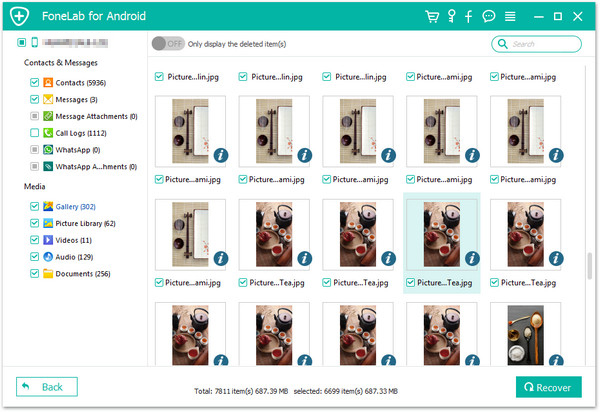
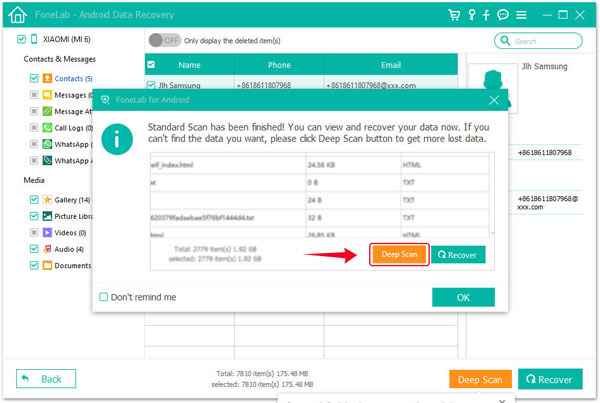
Tips: If all goes well, you have recovered the data you need, otherwise, you need to select the deep scan mode to rescan your device to find more hidden data. Don't be discouraged, your patience will be rewarded.
Part 3. Restore Data from Backup to vivo X60/X60 Pro/X60 Pro+
Android Data Recovery also has many unexpected features, selectively restoring data from the extracted backup files is one of them. If you get a backup file which is detectable by the program, then you can easily restore it to your vivo X60/X60 Pro/X60 Pro+.
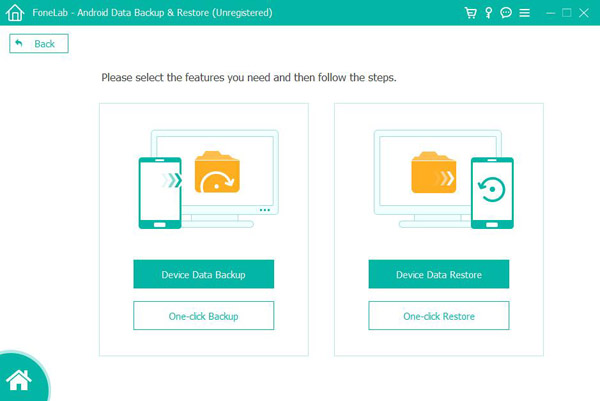
Step 1. Run the software and click on "Android Data Backup & Restore" in the main interface.
Step 2. Use a USB cable to connect your vivo X60, vivo X60 Pro or vivo X60 Pro+ to computer, the program will detect your device soon.
Step 3. After successful connection, you are allowed to choose one of the recover options, either "One-click Restore" or "Device Data Restore". The "One-click Restore" option is generally suitable for brand new or factory reset device, here we choose "Device Data Restore" as an example.
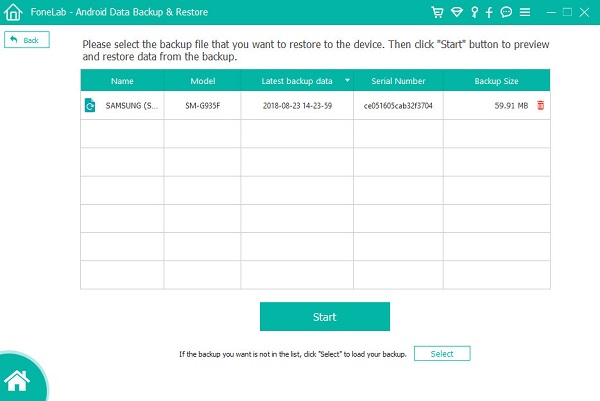
Step 4. Select a backup file from the list, the click on "Start" to extract all the recoverable contents from the selected backup file.
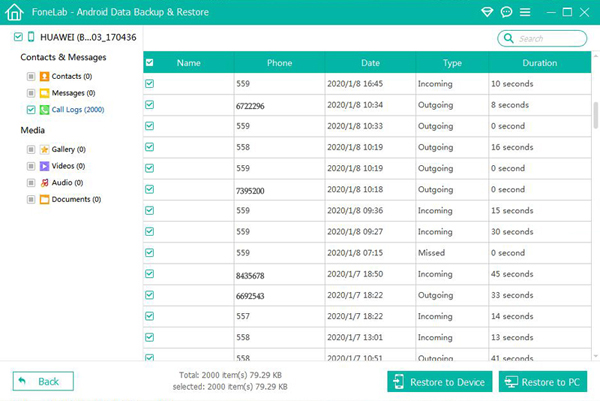
After selecting the files you need, click on "Restore to Device" to save them back to your vivo X60/X60 Pro/X60 Pro+, or click on "Restore to PC" to save them back to your computer.
Part 4. Retrieve Data from Previous Phone to vivo X60/X60 Pro/X60 Pro+
If you are so unlucky, none of the above methods can help you find the lost data. Please remember if you still have the data on your old phone. If so, you can use EasyShare App to easily transfer them to your vivo X60/X60 Pro/X60 Pro+.
Step 1. Download, install and run the EasyShare App on both of your old and new phone, then select "Replacement".
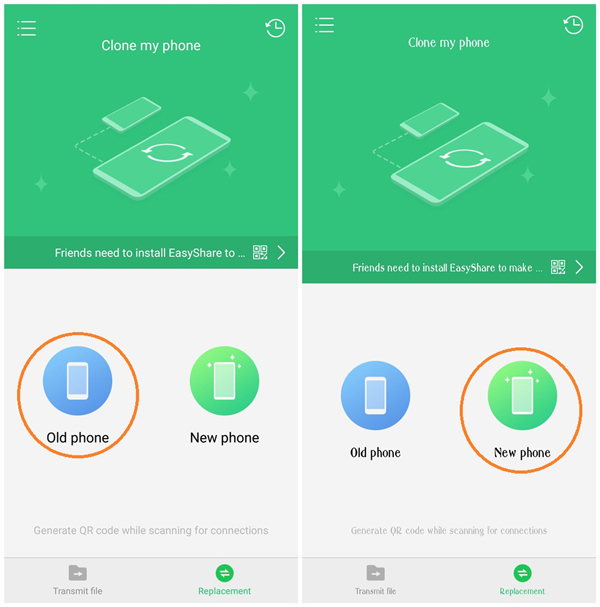
Step 2. Tap on "Old phone" on the EasyShare App of your old phone to generate a QR code. Tap on "New phone" on the EasyShare App of your vivo X60/X60 Pro/X60 Pro+.
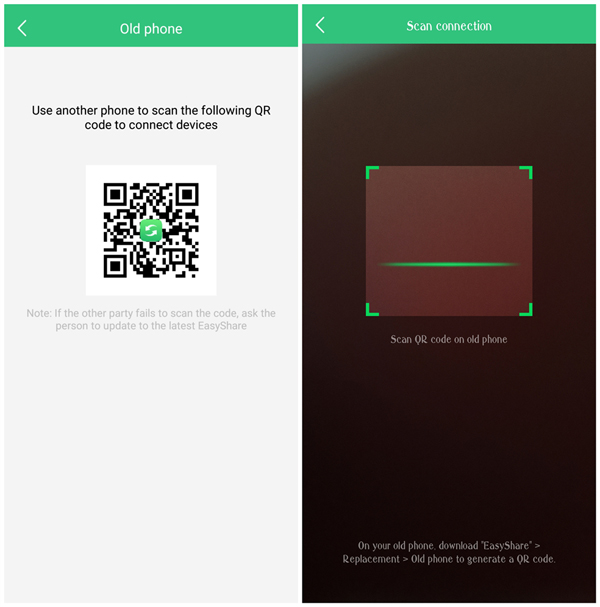
Step 3. Use the EasyShare App on your vivo X60/X60 Pro/X60 Pro+ to scan the QR code that display on the old phone to establish a connection between your phones.
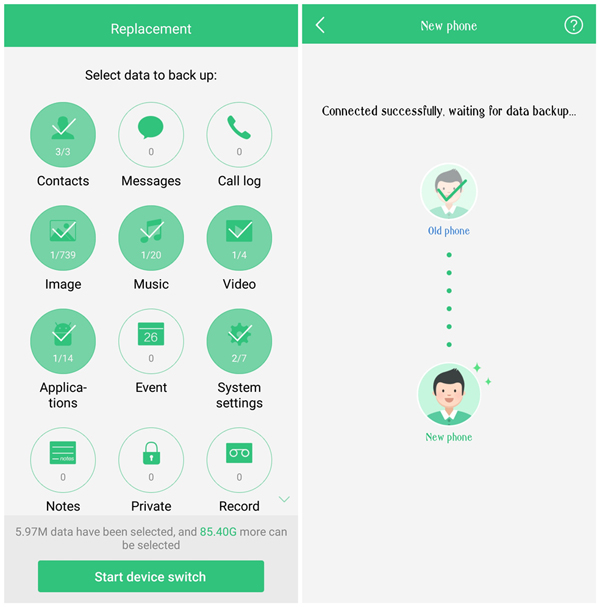
Step 4. Once the connection is successful, select the data you want to transfer to your vivo X60/X60 Pro/X60 Pro+, then click on "Start device switch".
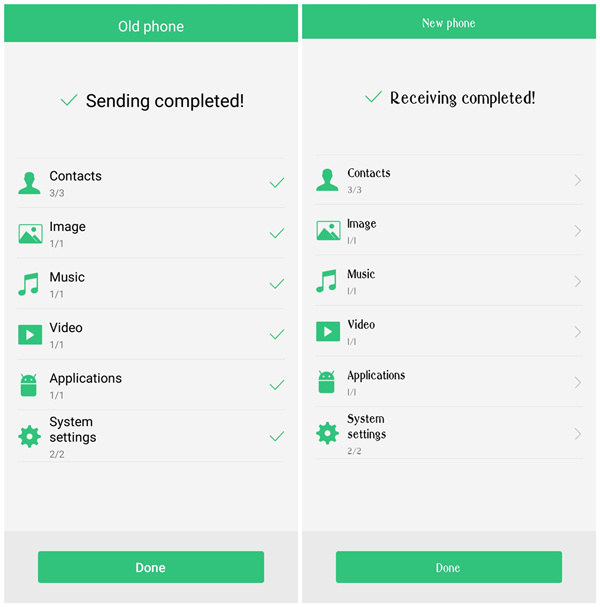
Wait for the data migration is complete, press "Done" on both of your devices.
Part 5. Back Up Data from vivo X60/X60 Pro/X60 Pro+ to Computer
In the last part of the article, we will introduce the backup function of the Android data recovery software. This function is used to remind you to backup your phone data regularly.
Step 1. Return to the homepage of Android Data Recovery software, then click on "Android Data Backup & Restore".
Step 2. Connect your vivo X60/X60 Pro/X60 Pro+ to computer using a USB cable.
Step 3. Select a backup mode according to your need, either "One-click Backup" or "Device Data Backup".
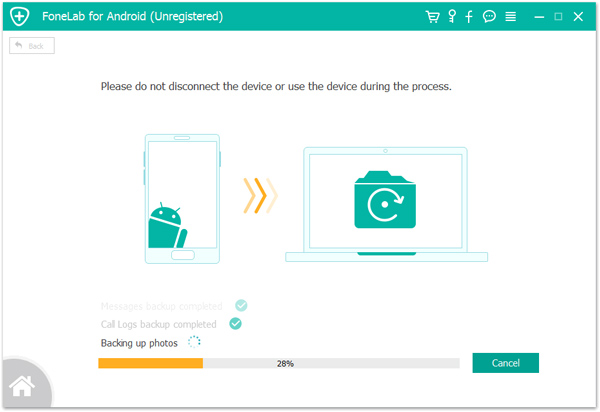
Step 4. Select the files you want to back up to your computer, then click on "Start" to go on. Please be patient until the backup is complete.