Panic over lost Vivo X200 photos, messages, or files? Stop using it NOW! Learn why data vanishes, explore backup checks, hidden folders, powerful recovery with SyncRestore, ADB tricks, and professional labs. Prevention tips included!

That sinking feeling. You pick up your sleek Vivo X200, maybe to show off a precious photo, find an important document, or continue a vital chat, only to discover it's gone. Vanished. Whether it was an accidental swipe, a mysterious glitch after an update, or the dreaded "Storage Full" warning leading to desperate deletions, losing data on your primary lifeline is incredibly stressful. Photos capturing irreplaceable moments, critical work files, heartfelt messages – the X200 holds fragments of our lives. But before you resign yourself to despair, take a deep breath. Recovering deleted or lost data from your Vivo X200 is often possible, and this guide is your roadmap to getting it back.
Why Data Disappears on Your X200: Understanding the Enemy
The first step in the recovery battle is understanding what you're up against. Data loss isn't magic; it usually stems from specific causes:
- Accidental Deletion: The most common culprit. A mis-swipe in the gallery, selecting the wrong file in "Files," or clearing a chat thread without realizing its importance.
- Software Glitches & Updates: Sometimes, an app crashes, the OS freezes, or an update (even Funtouch OS updates) doesn't install cleanly, potentially corrupting or making files inaccessible.
- Factory Reset: Performing a reset, whether intentionally to fix issues or accidentally, wipes the device's internal storage clean.
- Physical Damage: Dropping the X200, water exposure, or other physical trauma can damage the storage chip, making data extraction complex.
- Virus/Malware: Malicious software can corrupt, encrypt, or delete files.
- SD Card Issues: If you store data on a microSD card, the card itself can become corrupted, damaged, or improperly unmounted.
The Golden Rule: STOP Using Your Phone Immediately!
This is the single most critical piece of advice for any data recovery scenario. When a file is "deleted" on Android (including Funtouch OS), the operating system doesn't immediately erase the data from the physical storage (NAND flash memory). Instead, it marks the space those files occupied as "available for new data." Continuing to use your X200 – taking photos, installing apps, downloading files, even just browsing the web generating cache – risks overwriting the very data you want to recover. Put the phone down if possible. If you need essential communication, use another device.
Your Vivo X200 Data Recovery Toolkit: Proven Methods
Now, let's explore actionable solutions. We'll start with the simplest and least invasive, moving towards more powerful tools. Remember, time is your enemy – act quickly!
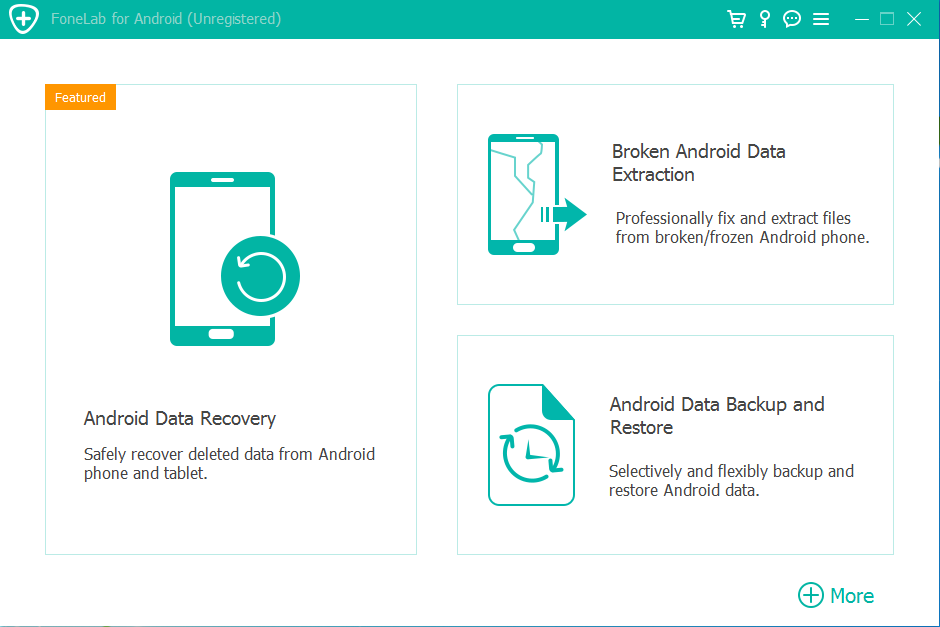
Method 1: Unleash SyncRestore Android Data Recovery (The Powerhouse Solution)
When backups fail and hidden folders come up empty, you need specialized software designed to scan the raw storage of your Vivo X200 for traces of deleted files. SyncRestore Android Data Recovery is engineered precisely for this task, offering a high success rate without requiring root access in many cases. Its deep scan algorithms meticulously search for recoverable file signatures.


Step 1. On a Windows PC or Mac, download SyncRestore from the official link above. Install it following the on-screen instructions.
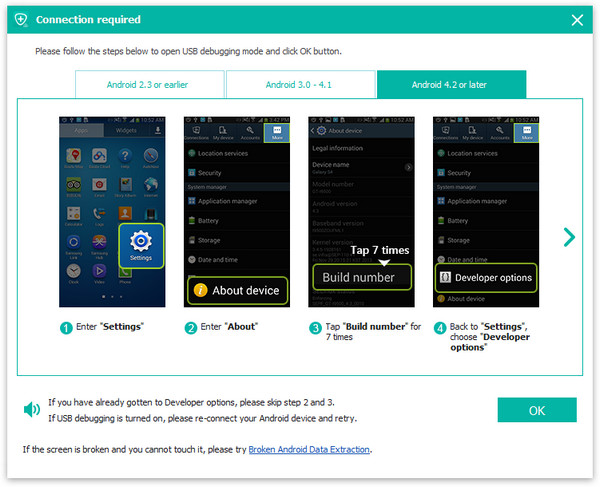
Step 2. Connect your Vivo X200 to the computer via USB cable. On the phone, pull down the notification shade and tap the USB notification. Select File Transfer or MTP mode. Then, go to Settings > About phone > Software information. Tap "Build number" rapidly 7 times to unlock Developer options. Go back to main Settings, enter Developer options, and enable USB debugging. Grant permission on the phone if prompted.
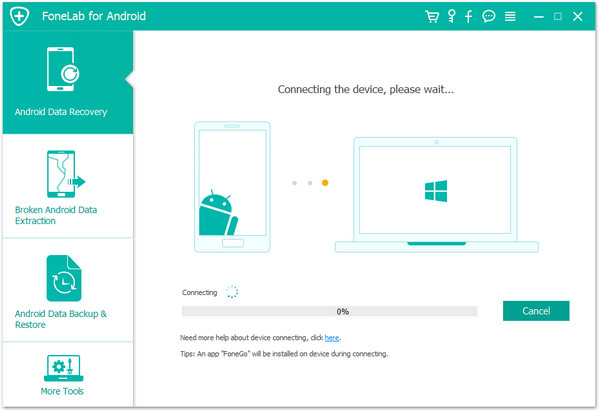
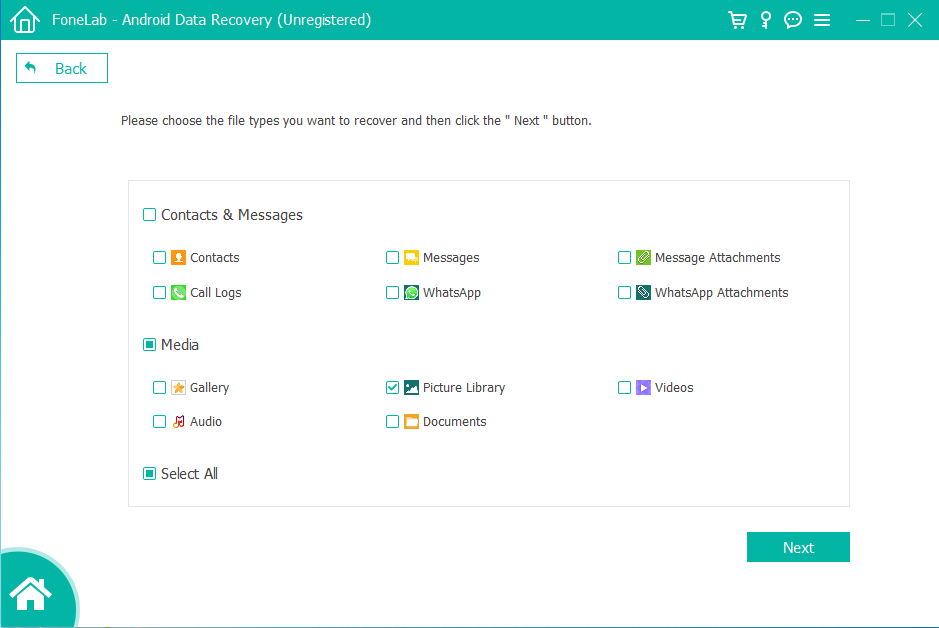
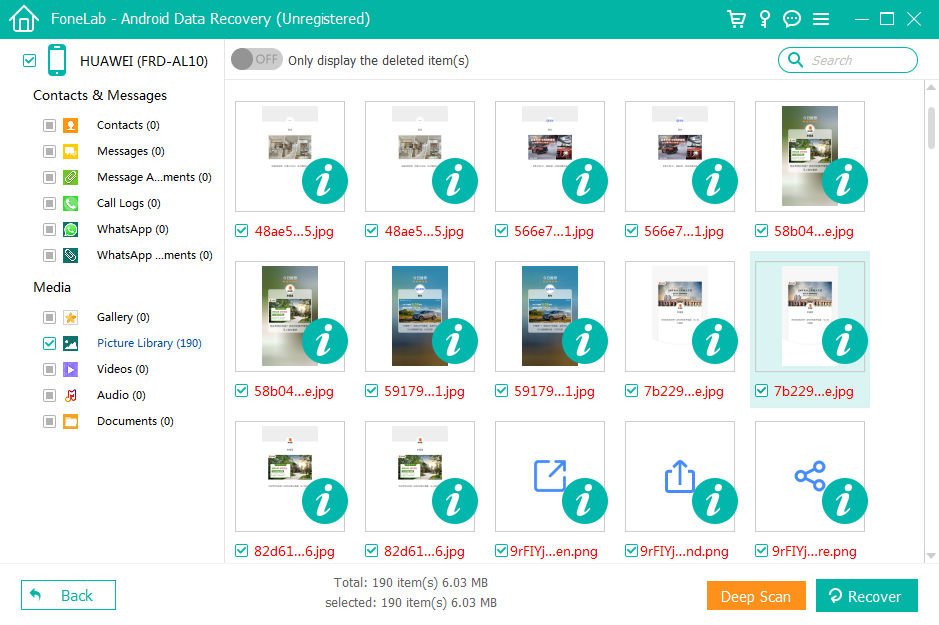
Step 3. Open SyncRestore. It should detect your X200. Select the types of data you want to recover (Photos, Messages, WhatsApp, Contacts, etc.). Click Start Scan. The software will perform a quick scan first, followed by a much deeper, more thorough scan (this takes time, be patient!).
Step 4. Once the scan completes, browse the categorized results (Deleted, Existing, Attachments). Preview recoverable files (especially photos/documents) to ensure they are intact. Select the items you want and click Recover. Crucially, choose to save the recovered files to your COMPUTER, NOT back to the phone to prevent overwriting.
SyncRestore bypasses the file system markers and scans the NAND flash memory directly for recognizable file patterns (like JPEG headers, SQLite database structures for messages). Its algorithms are optimized for modern Android versions and file systems.
High recovery success rate for recently deleted files. Recovers a wide array of data types. User-friendly interface with preview. No root needed for most recoveries. Regular updates ensure compatibility.
Method 2: Scour Your Backups (The Safest First Step)
Before diving into recovery software, always check if your lost data exists safely in a backup. Modern Android and Vivo offer several convenient options.
Steps & Details:
1. Google Photos: Open the Google Photos app. Tap "Library" > "Trash." Deleted photos and videos stay here for 30 days (60 days for Google One members). Look for your lost items and tap "Restore."
2. Google Drive: Open the Google Drive app. Tap "Trash" (hamburger menu > Trash). Files deleted from Drive reside here for 30 days. Find your file, tap the three dots, and select "Restore."
3. Vivo Cloud (if enabled): Go to Settings > Accounts & Sync > Vivo Cloud. Log in if needed. Check sections like "Gallery," "Contacts," "Notes," and "Backup & Restore." If you had automatic backups running, you might find a recent snapshot containing your lost data. You can restore specific data types or a full backup (note: a full restore erases current data).
4. Local Backups (PC/External Drive): If you manually backed up your X200 to a computer or external drive using Vivo's File Transfer mode or a third-party tool before the loss, connect and browse those backups now.
Note: This method retrieves data from known safe copies, posing zero risk to the phone's internal storage. It's the ideal scenario if backups were active. Relies entirely on pre-existing backups. If backups weren't enabled, weren't recent, or didn't include the specific lost files, this won't help.
Method 3: Digging into Device Folders (The Hidden Cache Check)
Sometimes, "deleted" files, especially photos and videos, might temporarily linger in app-specific cache folders before being permanently purged. This is a long shot but quick and harmless.
Steps & Details:
1. Open the Files by Google app (or your preferred file manager like Solid Explorer if installed).
2. Navigate to internal storage. Tap the three dots (menu) and ensure "Show hidden files" is enabled.
3. Explore folders, particularly:
- DCIM > .thumbnails (Sometimes contains lower-res copies of recently deleted photos).
- Pictures > .trash-* (Some apps, like certain gallery apps, might have their own hidden trash folders).
- Folders related to specific apps where deletion occurred (e.g., WhatsApp > Media > .Statuses for "viewed once" statuses if recently deleted).
4. Look for files with recent timestamps matching your loss. If found, copy them to a safe location like Downloads or an SD card.
Note: Apps often don't delete files instantly from their working directories. This method exploits that brief window. Highly unreliable. Files are usually purged quickly (minutes/hours). Folder names are not standardized. Requires knowing where to look. Won't work for most file types beyond images/videos.
Method 4: Leveraging ADB Backups (The Tech-Savvy Approach)
Android Debug Bridge (ADB) is a powerful command-line tool from Google. While not primarily a recovery tool, you can sometimes create a backup of app data including potentially deleted data that hasn't been overwritten, then extract specific files from it. Complexity Warning: This method requires comfort with command lines and technical troubleshooting.
Steps & Details:
1. Install ADB: Download the minimal ADB & Fastboot tools for your PC OS (Windows/macOS/Linux) and install them.
2. Connect & Enable Debugging: Connect X200 via USB (File Transfer mode). Enable Developer Options and USB Debugging as described in Method 3.
3. Open Command Prompt/Terminal: Navigate to your ADB installation directory.
4. Test Connection: Type adb devices and press Enter. You should see your device serial number. If prompted on the phone, authorize the connection.
5. Create Backup: Use the command: adb backup -f backup.ab -apk -shared -all. This attempts a full backup. Follow prompts ON YOUR PHONE SCREEN CAREFULLY. You'll need to set a password (remember it!). The backup file (backup.ab) will be saved in your ADB directory. This process can take a long time.
6. Extract Backup: The .ab file is a compressed, encrypted archive. Use tools like android-backup-extractor (search online) to convert it to a .tar file using the password you set. Extract the .tar file. You'll get folders representing app data. Navigate these complex folders (e.g., apps/com.whatsapp/db/msgstore.db.crypt12 for WhatsApp messages) hoping your deleted data is still present. Requires knowing specific app file structures.
Note: If an app hasn't yet purged its deleted database entries or cache files, they might be included in the app data portion of the backup. Extremely technical and unreliable for specific file recovery. Success heavily depends on the app's internal data management. Backups often fail on modern Android versions or encrypted devices. Requires decrypting and manually searching obscure folders. Not recommended for casual users.
Method 5: Contact Vivo Support or a Data Recovery Lab (The Last Resort)
If software methods fail, especially in cases of physical damage (water, drops, no power), severe corruption, or overwritten data, professional intervention is necessary.
Steps & Details:
1. Vivo Official Support: Contact Vivo customer service through their website, app, or visit an authorized service center. Explain the data loss situation clearly. Be aware: Their primary focus is hardware repair. They likely lack tools for complex data recovery and may perform a factory reset during repair, permanently erasing data. Ask specifically about data recovery possibilities before authorizing any service.
2. Specialist Data Recovery Labs: Seek reputable, professional data recovery services. These labs have clean rooms, specialized hardware tools (like chip-off readers), and proprietary software far beyond consumer-grade solutions. They can handle physically damaged storage chips and complex logical corruption.
- Research labs with specific expertise in Android and NAND flash recovery.
- Expect high costs (hundreds to thousands of dollars) and no guaranteed success.
- The process involves shipping your phone (remove SIM/SD first) or visiting in person.
Note: Professionals have tools and expertise inaccessible to consumers, capable of dealing with severe physical and logical damage. Very expensive. No guarantee of success, especially with overwritten data or severe physical damage. Time-consuming process. Risk of permanent loss if handled improperly.
Prevention is Paramount: Guard Your X200 Data
Recovery is stressful and uncertain. Protect your future self:
- Enable Automatic Backups: Crucially, turn on Google Photos backup (choose High quality or Original resolution), Google Drive backup for app data and settings, and explore Vivo Cloud's backup features. Set them to run over Wi-Fi.
- Regular Manual Backups: Periodically connect your X200 to a PC and copy important files (DCIM, Documents, Downloads folders) to an external hard drive or cloud storage (Dropbox, OneDrive).
- Use a Reliable microSD Card: If expanding storage, buy a reputable, high-endurance card (Class 10, A2, V30). Format it in the phone (Settings > Storage > SD card > Format). Regularly back up the SD card too!
- Manage Storage Wisely: Use the built-in "Storage" settings (Settings > Storage) to clean junk files, cache, and large/unused apps regularly. Avoid filling storage beyond 90%.
- Handle with Care: Use a protective case and screen protector to minimize physical damage risk.
Frequently Asked Questions (FAQs)
1: I deleted photos a week ago. Can I still get them back?
It's possible but less likely than immediate recovery. Your chances depend heavily on how much you've used the phone since deletion. Stop using it immediately and try SyncRestore or check Google Photos/Vivo Cloud Trash. Over time, overwriting is almost guaranteed.
2: Do I need to root my Vivo X200 for data recovery?
Not necessarily. Modern tools like SyncRestore can recover many data types (photos, videos, documents, some messages) without root access. Rooting can potentially enable deeper scans for other data like app databases but carries risks (voiding warranty, bricking device, security vulnerabilities) and isn't recommended solely for recovery unless advised by professionals.
3: My Vivo X200 won't turn on/is water damaged. Can I recover data?
Software methods won't work if the phone is physically damaged and cannot power on or be recognized by a computer. Your only viable option is a professional data recovery lab with clean room facilities and chip-off recovery capabilities. This is expensive and success isn't guaranteed.
4: Is it safe to use free data recovery apps from the Play Store?
Exercise extreme caution. Many "free" recovery apps are ineffective, ad-ridden, or even malicious. They rarely have the low-level access needed for true deleted file recovery. Some might require root, posing additional risks. Using them could generate cache/data, overwriting what you want to recover. Trusted PC-based software like SyncRestore is generally safer and more effective.
5: I did a factory reset. Is my data gone forever?
A factory reset erases user data. However, the raw data often remains on the storage until overwritten. Immediately stop using the phone. Your best chance is using powerful recovery software like SyncRestore before setting up the phone again or adding any data. The sooner you act, the higher the success rate. Once the phone is reused significantly after reset, recovery becomes very difficult.
Conclusion: Your Path to Vivo X200 Data Recovery
Losing data on your Vivo X200 is a panic-inducing event, but it's frequently not the end of the story. Acting quickly is paramount. Your recovery journey should start with these steps:
- STOP USING THE PHONE to prevent overwriting.
- Check Backups: Thoroughly explore Google Photos Trash, Google Drive Trash, Vivo Cloud, and any PC backups.
- Try Quick Checks: Look in hidden folders using a file manager (low chance, but quick).
- Employ Dedicated Software: For the highest chance of recovering recently deleted files without backups, use SyncRestore Android Data Recovery. Its deep scan is designed for this exact scenario.
- Consider Advanced/Lab Options: If software fails and data is critical, explore ADB (technical) or professional data recovery labs (expensive, for severe damage).
Finally, turn this stressful experience into a lesson: implement robust, automatic backups using Google services, Vivo Cloud, and regular PC copies. Prevention is infinitely easier and more reliable than recovery. With the right approach and tools, you stand a strong chance of rescuing your precious Vivo X200 data.


