5 simple methods allow users to transfer all data between different phone to vivo V25e, restore data from backup file to vivo V25e, and retrieve the deleted and lost data from vivo V25e without backup.
This article will introduce the process of fast transferring data including photo album, audio, software and other large files from any Android/Samsung to vivo V25e from five aspects.
vivo V25e is equipped with a 6.44-inch FHD+ resolution AMOLED display, with a rear lens of 64 million pixels+2 million pixels+2 million pixels and a front self-timer lens of 32 million pixels. Vivo V25e has a built-in 4500mAh and supports 44W wired fast charging. The processor vivo V25e is equipped with Helio G99 chipset.
vivo V25e is eye-catching in terms of screen, camera, processor and battery, and it is worth users to try. After purchasing vivo V25e, users are faced with an empty new mobile phone, which usually requires synchronous backup and migration of the original device data. In this paper, the methods of data transmission in different scenarios are prepared, and users are asked to choose the appropriate course to operate according to the actual situation.
When users want to transmit data from different system devices, we recommend downloading the Mobile Transfer software. Mobile transfer supports the data synchronization of the whole platform, and the transmitted data quality is lossless. It is only necessary to connect the old and new devices to the same computer with data cables at the same time. By the way, mobile transmission of synchronous data takes short time, is stable and safe, and does not limit the synchronization speed.


Part 1 Directly Sync All Data from Android/Samsung to vivo V25e
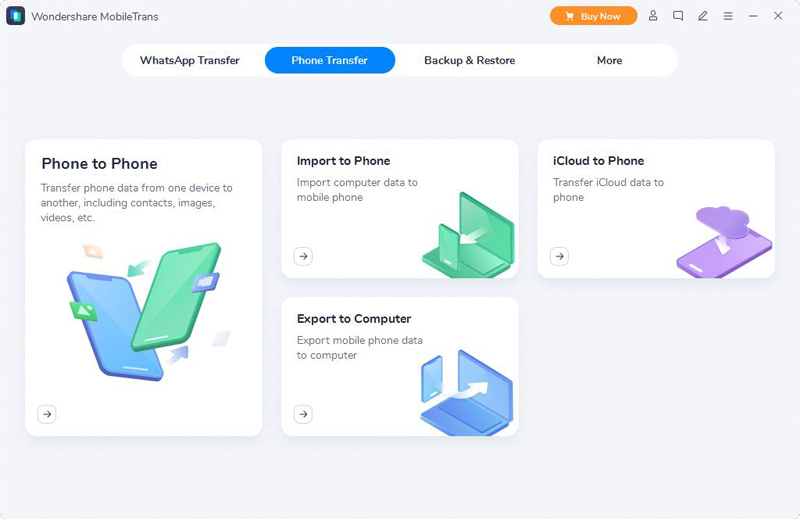
Step 1. Run Mobile Transfer and click "Phone Transfer" > "Phone to Phone" on the main page in sequence.
Step 2. Connect vivo V25e and old Android/Samsung phones to this computer with USB cable.
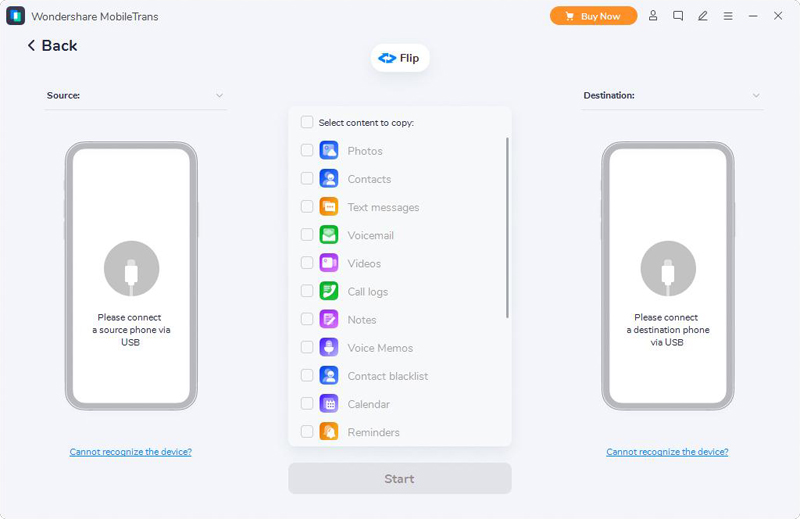
Tip: Click "Cannot recognize the device?" if the software is not recognized after connection. Button, follow the on-screen instructions to re-identify the device.
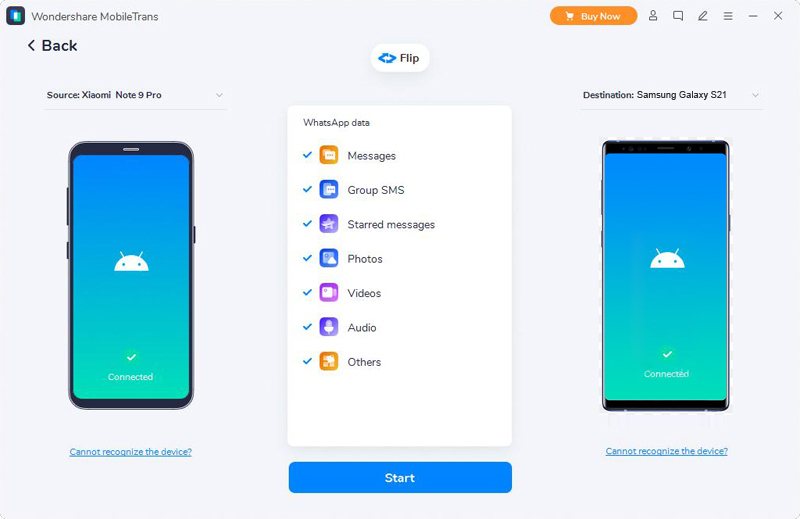
Notice: The "Flip” button can adjust the track of vivo V25e and the original equipment. Click this button to keep vivo V25e in the DESTINATION panel all the time, so that the subsequent synchronization can proceed smoothly.
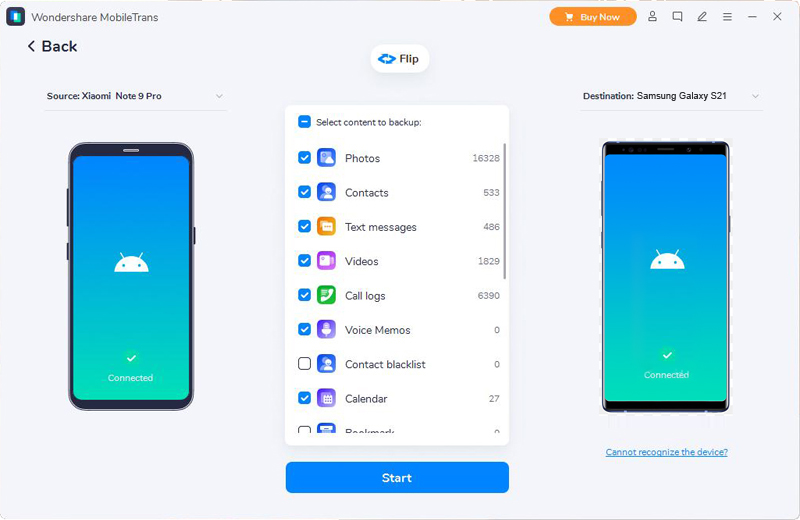
Step 3. After the software shows that both vivo V25e and the original device are successfully identified, select the data to be synchronized in the interface list, and then click "Start" to start data transmission.
Part 2 Sync Data from Backup File to vivo V25e
There are also many users who have the habit of regularly backing up their local data to the cloud or computer. Considering this group of people, Mobile Transfer has set the function of synchronizing data directly from the backup file to vivo V25e.
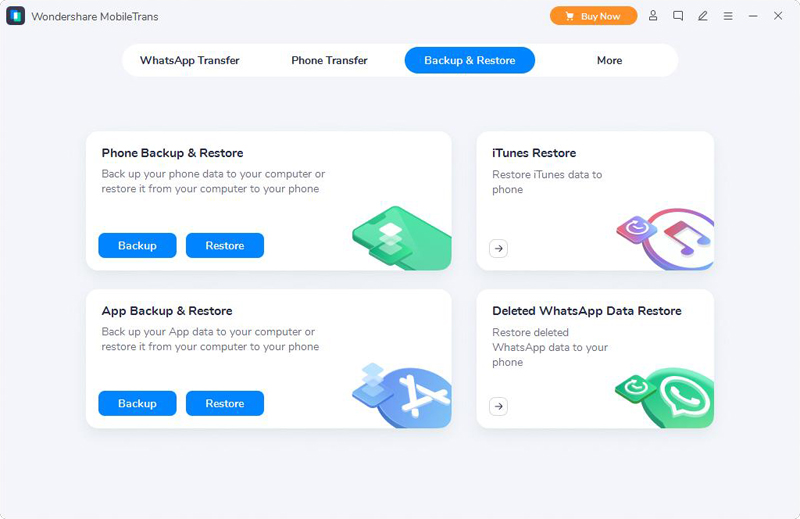
Step 1. Run Mobile Transfer, then click the "Backup & Restore" option on the home page, and then click "Restore" in the "Phone Backup & Restore" function.
Step 2. After all files are listed, select the data to be synchronized, and then click "Restore".
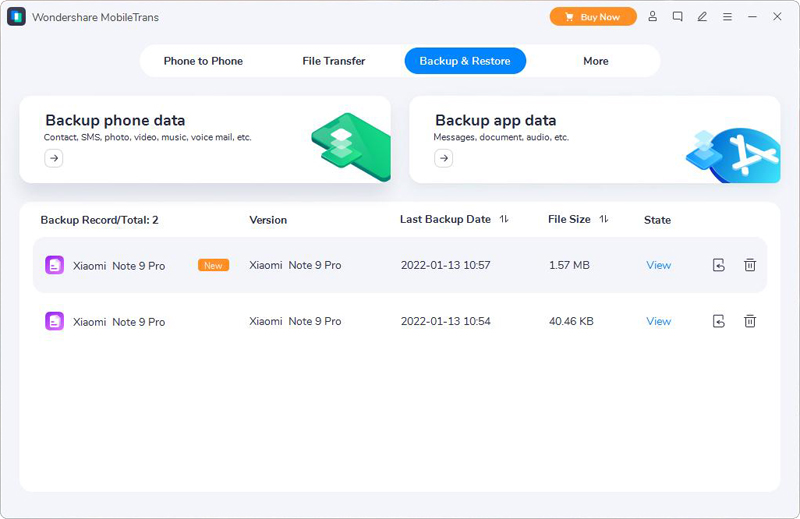
Tip: If you can't find the required file in the file list, you can choose to download the file from the specified path.
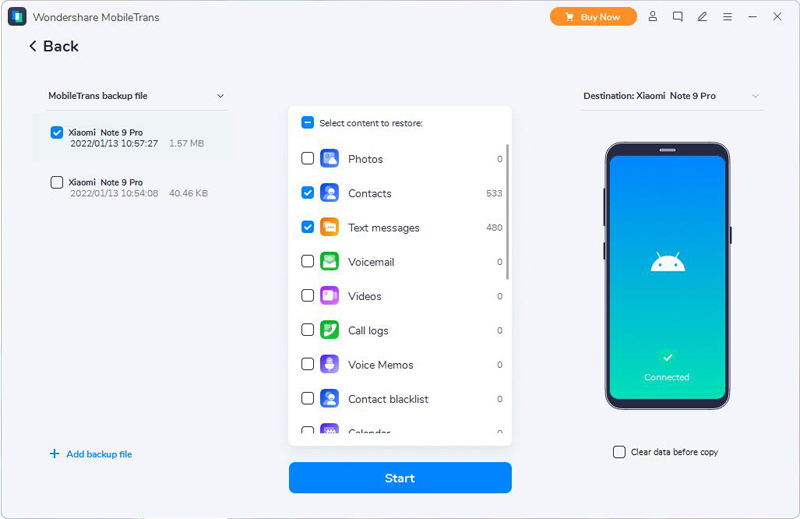
Step 3. Connect vivo V25e to the computer with USB cable, and then click the "Start" button to start data synchronization.
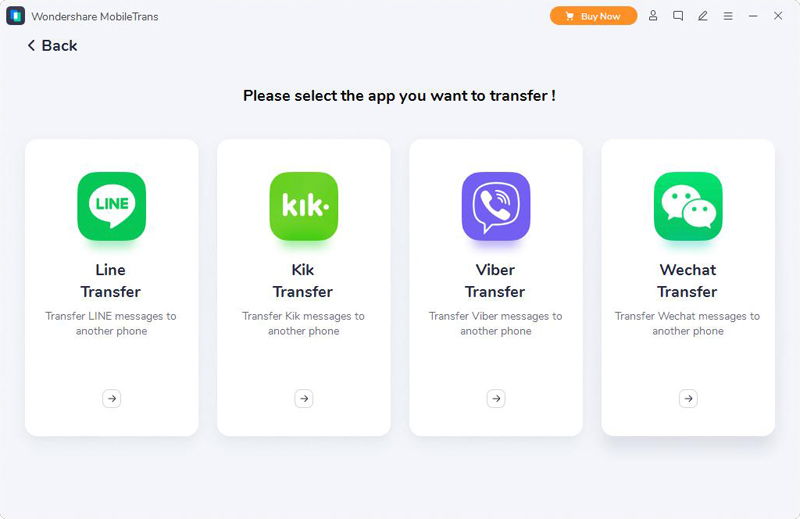
Part 3 Transfer WhatsApp/Wechat/Line/Kik/Viber Messages to vivo V25e
Information on WhatsApp/Wechat/Line/Kik/Viber often needs multi-terminal real-time synchronization. Although these softwares have their own data synchronization function, it takes a long time and the transmission speed is slow. We recommend users to use mobile transmission to complete synchronization.
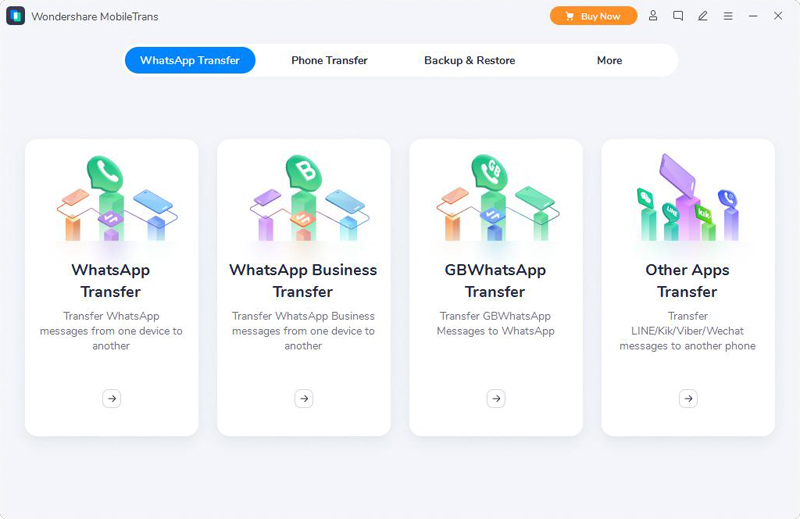
Step 1. Launch Mobile Transfer, select "WhatsApp Transfer" according to the software to synchronize information, and you can see four options will appear on the page. Click the corresponding option according to the specific software.
Step 2. Connect the old and new devices to the same computer with a data cable, and then wait for the software to automatically recognize the two phones.
Step 3. Check the data that needs multi-terminal synchronization in the middle of the page, finally click "Start" and wait for the data transmission progress to be 100%.
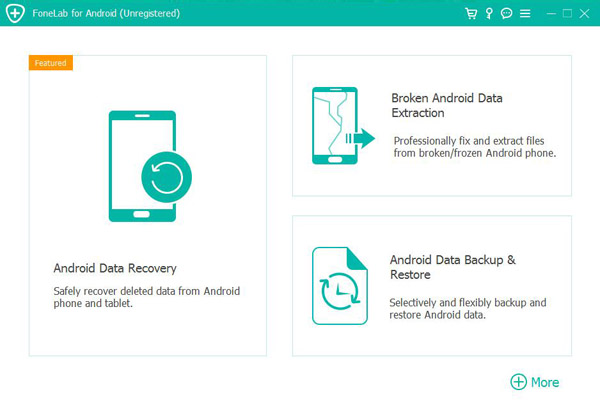
Accidentally deleted important documents by mistake? Or did you accidentally format the device? Don't worry, Android Data Recovery software can scan the phone deeply when these situations happen, and retrieve files for users. Android Data Recovery software is a professional data recovery software, which can recover files that cannot be retrieved by general data recovery software. The interface of the software is simple and beautiful, and it is easy to operate safely. We suggest that you follow the following steps to recover the data after installing it.
Part 4 Directly Restore Data on vivo V25e without Backup
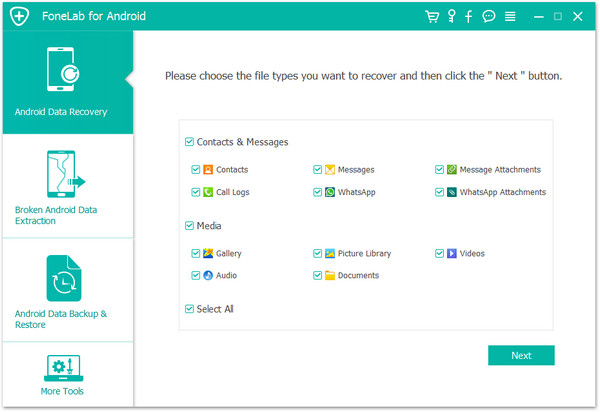
Step 1. Start the software on your computer, and then click the "Android Data Recovery" option in the software start interface.
Step 2. Connect the vivo V25e with the computer through the data cable, and then enable the USB debugging mode in vivo V25e (the specific operation sequence is: click settings > about > tap 7 times build number > back to settings > developer options), and then click OK.
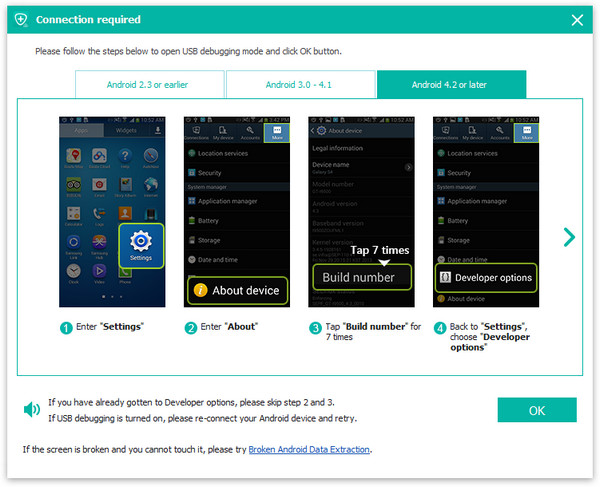
Tip: In case of broken screen or unrecognizable software, please click "Broken Android Data Extraction" and "Device connected, but can't be recognized?" at the bottom of the page. Get help. ",according to the tutorial shown to solve the problem.
Step 3. Back to the standard scan mode, click "Next" to start scanning the mobile phone data.
Step 4. After scanning, click "Recover" to start recovering data to vivo V25e.
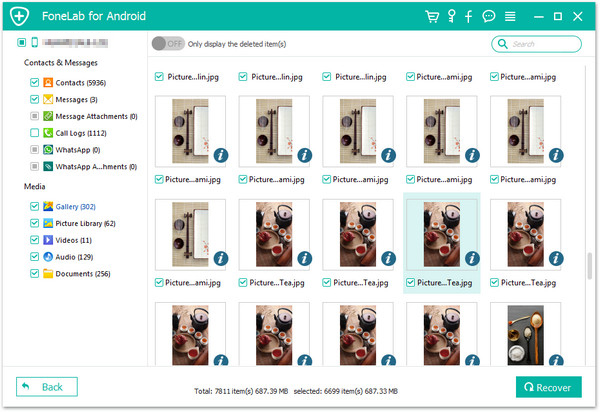
Tip: The "Deep Scan" button can help users find more or hidden files in their phones.
Part 5 Restore Data from Backup to vivo V25e
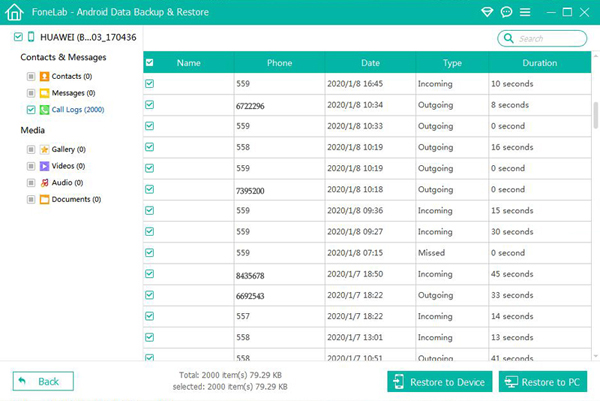
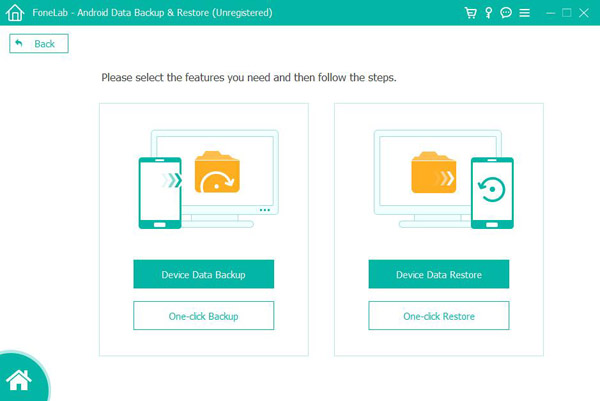
Step 1. To start Android Data Recovery, click the "Android Data Backup & Restore" option on the main page.
Step 2.Connect vivo V25e to the computer with USB cable, and then click "Device Data Restore".
Step 3. Click Start after checking the data to be backed up.
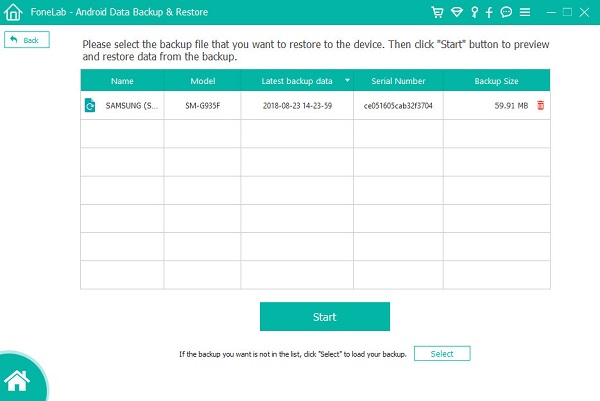
Step 4. After the page displays the data that can be completely recovered from the cloud, select it as needed, and finally click "Restore to Device" to start data migration.