5 best ways to transfer all data from Android/Samsung phone to Redmi Note 12/12 Pro/12 Pro+, and to restore deleted and lost files on Redmi Note 12/12 Pro/12 Pro+.
This article will be divided into two main sections on how to transfer data from old Android/Samsung phones to Xiaomi Redmi Note 12/12 Pro/12 Pro+ and how to recover deleted or lost data on Xiaomi Redmi Note 12/12 Pro/12 Pro+, I am sure you will go through this article I am sure you will have a better understanding of this through this article.
- Xiaomi Redmi Note 12 Pro has a matte glass AG back cover and a 6.67-inch 2400 x 1080 flexible rectilinear OLED screen with support for 120Hz refresh rate and 240Hz touch sampling rate; Xiaomi Redmi Note 12 Pro is powered by a Tiangui 1080 processor and features a 50MP Sony IMX766 sensor The main camera supports OIS optical stabilization. It also has an 8MP ultra-wide-angle + 2MP macro lens and a 16MP front-facing lens with a center hole. The Redmi Note 12 Pro also features a 67W Flash + 5000mA battery.
- The Xiaomi Redmi Note 12 Pro+ has the same 5000mAh battery as the Redmi Note 12 Pro, supports 120W fast charging, has a Surge P1 chip, charges to 100% in 19 minutes, comes with a 120W gallium nitride charger, and has a 200MP Samsung HPX sensor, but the processor, screen design, and other aspects are almost identical to the Redmi Note 12 Pro. The Redmi Note 12 Pro is virtually identical to the Redmi Note 12.
- The Xiaomi Redmi Note 12 is identical to the Redmi Note 12 Pro+ in every way except for the back cover design and fast charging. The Xiaomi Redmi Note 12 features 210 W fast charging, with a full charge in just 9 minutes.
After learning about Redmi Note 12/12 Pro/12 Pro+, I am sure you will be attracted by its excellent performance and configuration. However, have you found an easy and effective way to transfer data files from old Android/Samsung smart devices as well as recover lost or deleted important data from your phone to Redmi Note 12/12 Pro/12 Pro+? Below, you will be introduced to 5 related methods using mobile transfer and Android data recovery software.
Mobile Transfer is a data management software that combines transfer and backup functions and is highly rated by users in the market. It consists of four main parts: WhatsApp Transfer, Phone Transfer, Backup & Restore and More. With the help of Mobile Transfer, you can quickly transfer data to your new phone through simple With the help of Mobile Transfer you can quickly transfer data to your new phone with a simple operation and it works with almost all smartphones on the market; Mobile Transfer is highly compatible and supports the transfer of many data types, including contacts, call logs, photos, videos, music, apps and up to 17 other types of files. It helps people's lives tremendously and is a great software for people to use and study.

We believe that you have gotten to know this Mobile Transfer by the above description. Please download the software to your computer by clicking the appropriate button according to your computer system. Once installed, follow the specific steps in Parts 1 to 3 to use the software.
Part 1 Transfer Data from Android/Samsung to Redmi Note 12/12 Pro/12 Pro+
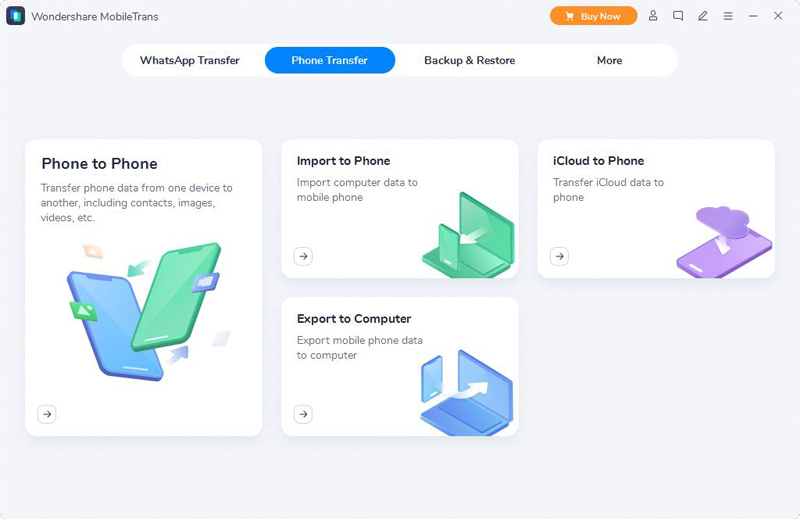
Step 1: Select the appropriate version of the button, download the software to your computer, install and run Phone Transfer. Open the "Phone to Phone" module and select the "Phone Transfer" button.
Step 2: Now, connect your old Samsung or Android device and Redmi Note 12/12 Pro/12 Pro+ to the same computer using a USB cable.
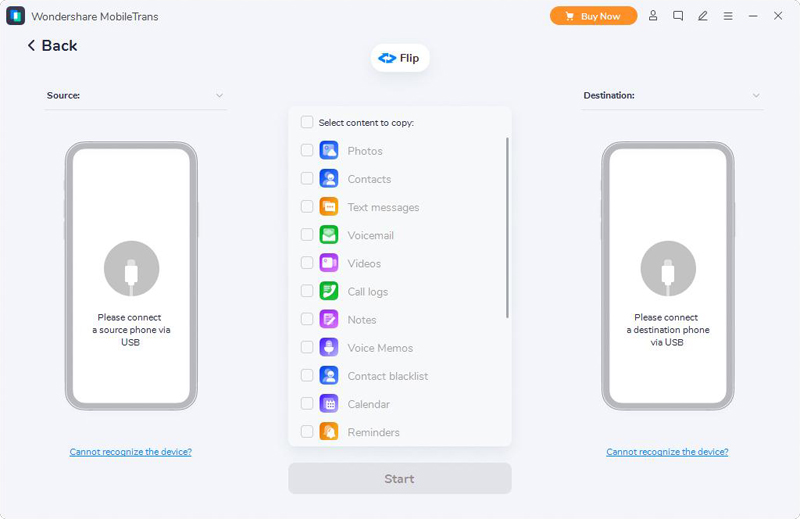
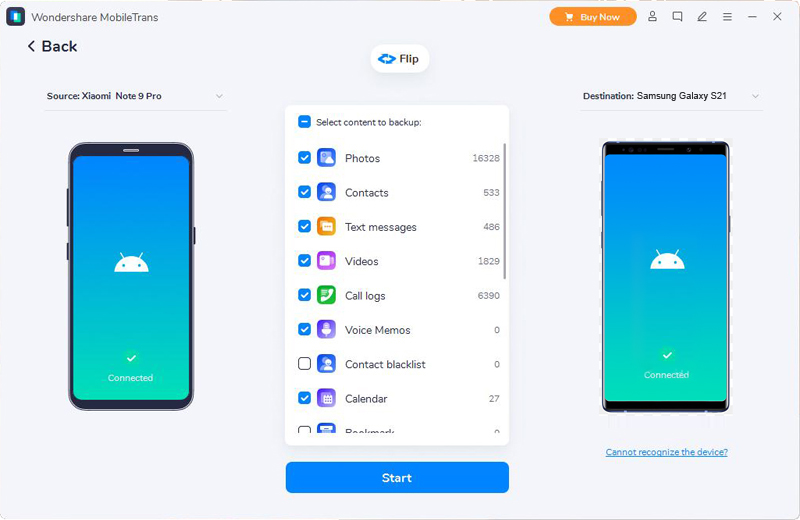
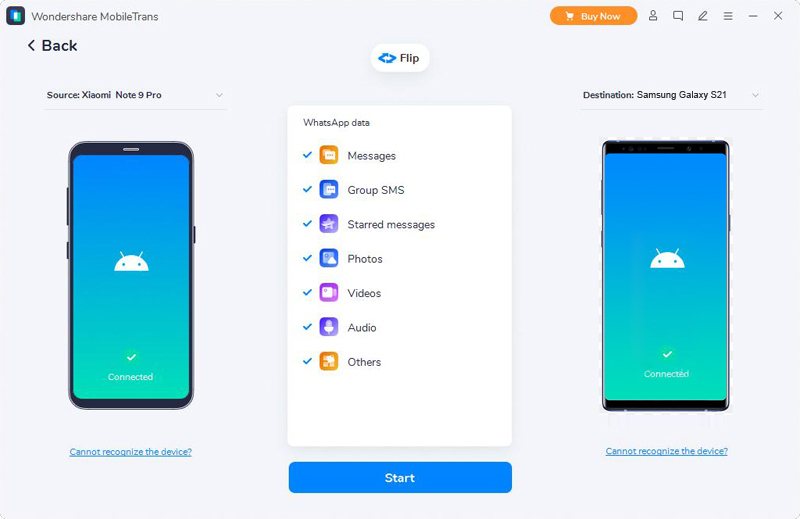
Note: Once successfully connected, note that the old Android/Samsung should be on the left and the Redmi Note 12/12 Pro/12 Pro+ should be on the right.If the connection is reversed, click the "Flip" button to reverse the position of the two phones for further operation.
Step 3: Select the files you need and click on "Start" to sync them from your old Android/Samsung to your Redmi Note 12/12 Pro/12 Pro+.
Part 2 Sync Data from Backup to Redmi Note 12/12 Pro/12 Pro+
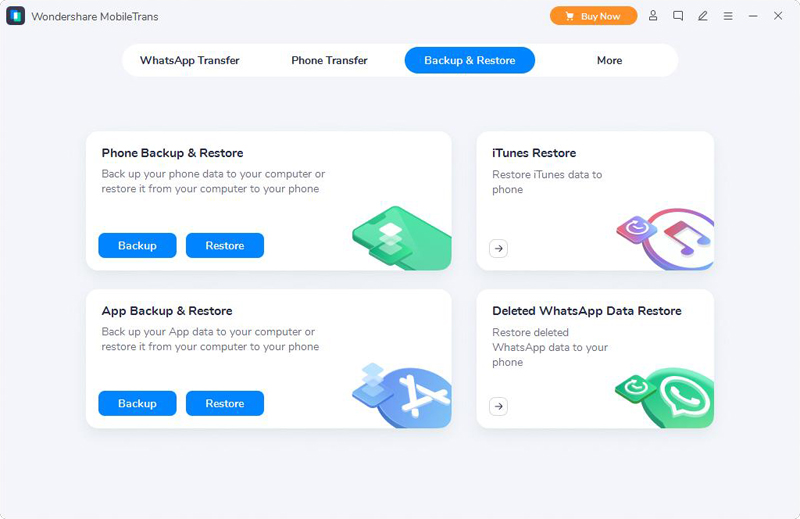
Step 1: Return to the main interface of the transfer software, click the "Backup and Restore" module, and then press the "Restore" button in the "Phone Backup and Restore" option.
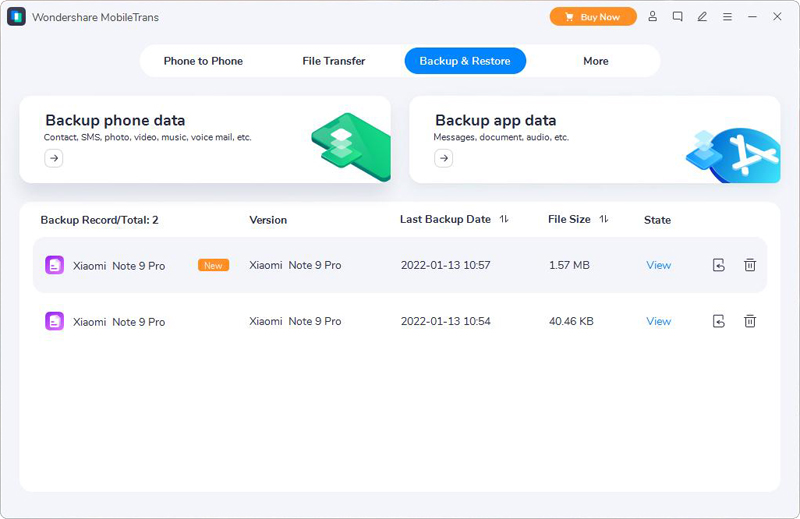
Step 2: When the program lists all backup files, select a backup file as needed and click the "Restore" button behind it to continue.
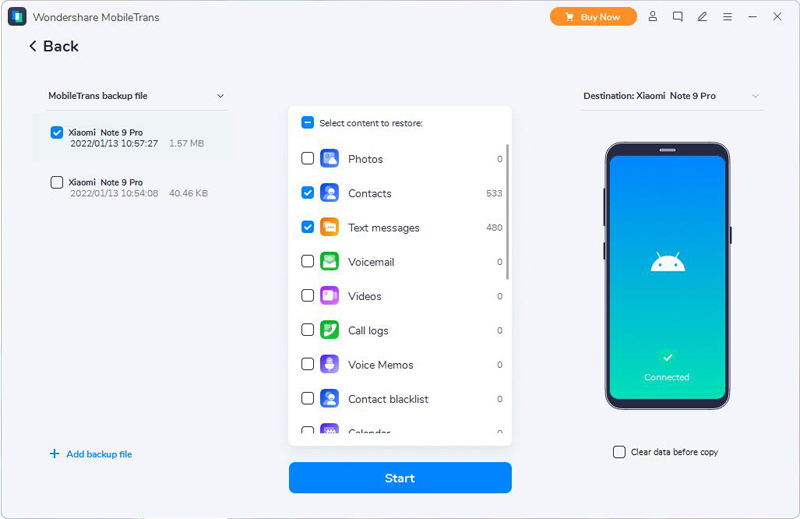
Step 3: Next, please connect your Redmi Note 12/12 Pro/12 Pro+ to your computer with a USB cable, then select the data you need to restore and click "Start" to sync them to your phone.
Part 3 Transfer WhatsApp/Wechat/Kik/Line/Viber Messages to Redmi Note 12/12 Pro/12 Pro+
Step 1: Go back to the main screen of Mobile Transfer and click on the "WhatsApp Transfer" module, you will see four options, namely "WhatsApp Transfer", "WhatsApp Business Transfer", "GBWhatsApp Transfer" and "Other Apps Transfer".
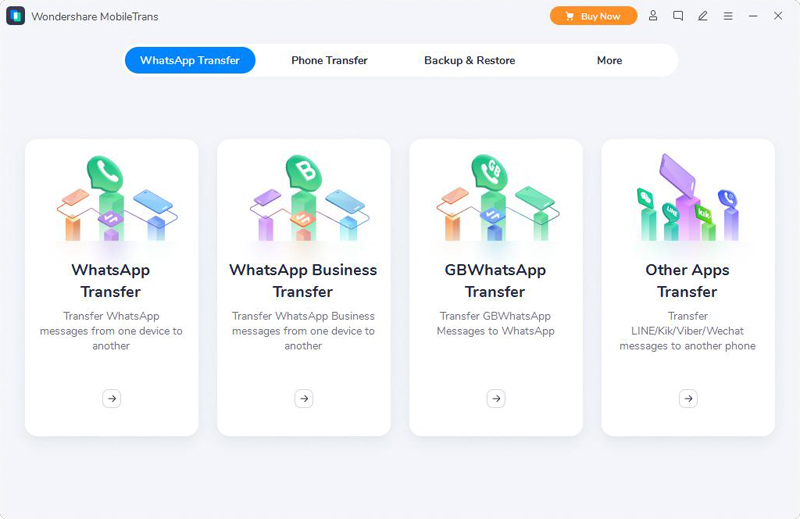
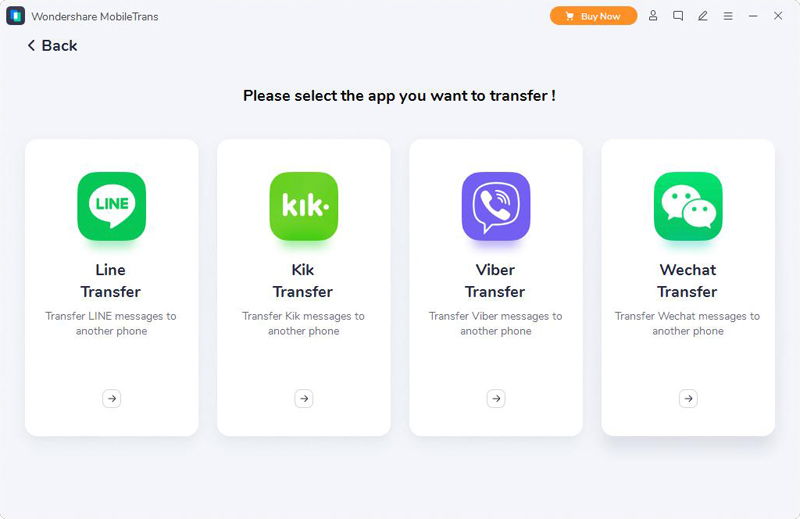
Tip: If you want to transfer your WhatsApp chats, etc. between phones, you can select the appropriate module according to your needs, i.e. "WhatsApp Transfer", "WhatsApp Business Transfer" or "GBWhatsApp Transfer". If you want to transfer Wechat/Line/Kik/Viber chats, you can open the " Other Apps Transfer" module and select the corresponding "Line Transfer", "Kik Transfer", "Viber Transfer" or "Wechat Transfer" according to your needs.
Step 2: Connect your old phone and Redmi Note 12/12 Pro/12 Pro+ to the same computer with two USB cables, select the file types as you want, and then click "Start" to transfer them to Redmi Note 12/12 Pro/12 Pro+.
Parts 1-3 above are specific tutorials on Mobile Transfer. After understanding the Mobile Transfer software, you may encounter another question. What is the best thing we should do when we accidentally delete or lose important cell phone data? At this time, this simple, fast, secure and efficient software is very important. We highly recommend you to use Android Data Recovery software for Android.
Android Data Recovery is a professional, efficient and secure data management software. The software has many useful features, such as data recovery, data backup and system repair. It can easily recover (on any Android) almost all data lost in your phone (except data erased by shredder), and quickly backup your phone data and fix Android system abnormalities with one click.
We believe that you have gotten to know this Mobile Transfer by the above description. Please download the software to your computer by clicking the appropriate button according to your computer system. Once installed, follow the specific steps in Parts 4 to 5 to use the software.
Part 4 Recover Data from Redmi Note 12/12 Pro/12 Pro+ without Backup
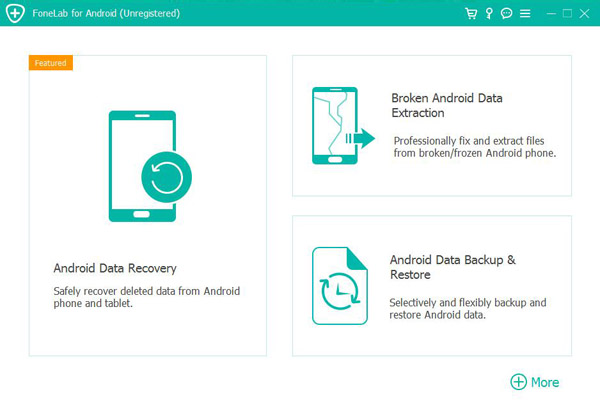
Step 1: Download, install and run the data recovery software on the computer, and then click the "Android Data Recovery" module.
Step 2: Connect Redmi Note 12/12 Pro/12 Pro+ to the computer with USB cable, and the computer will automatically detect your mobile phone.
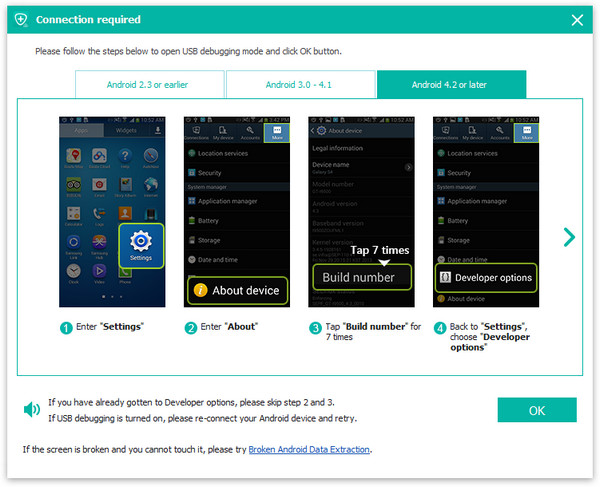
Tip:Please remember to enable the USB debugging on your phone’s screen, then tap “OK” to go on.
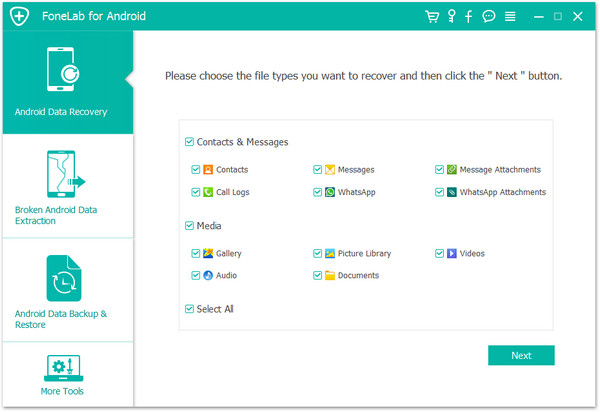
Step 3: Select the file type to be recovered, and then click the "Next" button to scan the selected lost contents.
Step 4: After successful scanning, preview the lost data in the selected file. Select the required file and click the "Recover" button to start restoring data to your Redmi Note 12/12 Pro/12 Pro+.
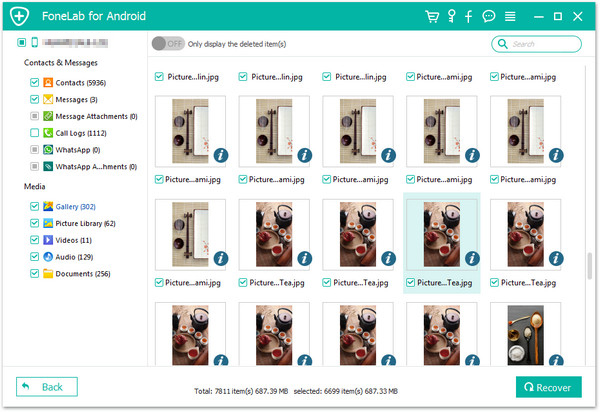
Tip: If you can not find the data you wanted, click “Deep Scan” to re-scan your device to find more contents.
Part 5 Restore Data from Backup to Redmi Note 12/12 Pro/12 Pro+
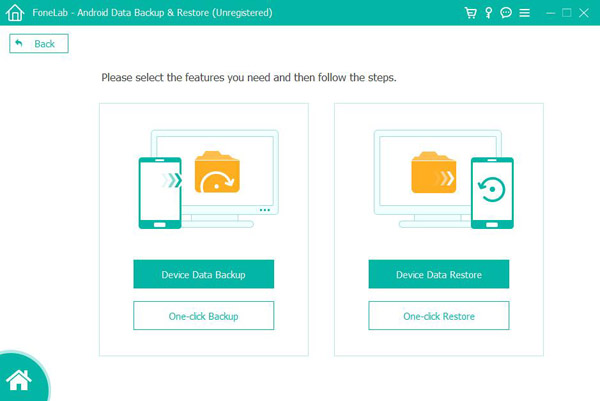
Step 1: Run the recover software on your computer and click on "Android Data Backup & Restore" on the homepage.
Step 2: Use a USB cable to connect your Redmi Note 12/12 Pro/12 Pro+ to the computer.
Step 3: Select "Device Data Restore" or "One-click Resrore" on the page.
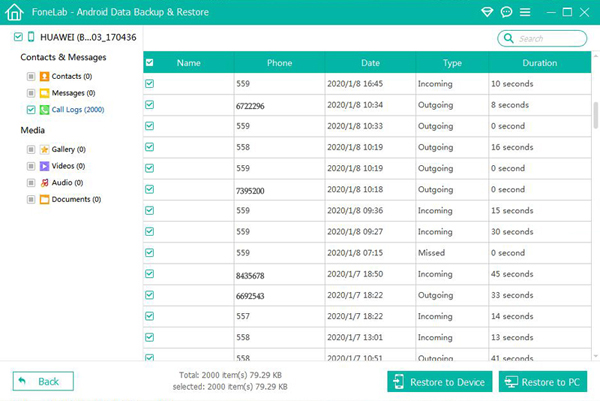
Step 4: Select the backup file you want to restore to your phone from the list and click the "Start" button to extract all the restoreable file from the selected backup file.
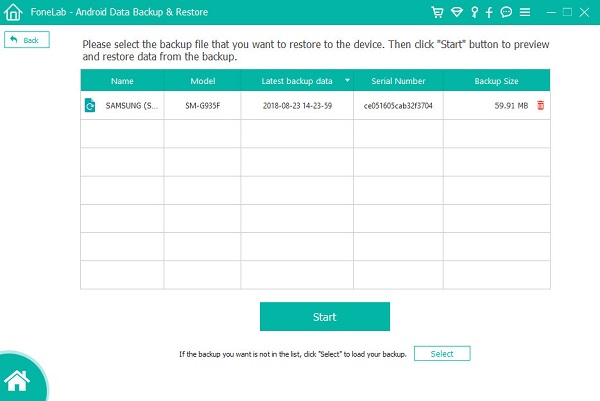
Step 5: Select the required backup file and click the "Restore to Device" button to start restoring data back to your Redmi Note 12/12 Pro/12 Pro+, or click on "Restore to PC" to save them back to your computer.