4 best ways to manually & automatically update your drivers in Windows 11/10/8.1/7, and recover the deleted and lost files on your Windows computer.
You can't use your computer because of outdated or missing drivers, right? Please don't worry, this article will tells you to the most simple and secure methods to download and install the most appropriate or latest driver for the corresponding hardword on your computer no matter it is running Windows 11, Windows 10, Windows 8.1 or Windows 7.
Why we need to update our drivers in Windows?
Drivers are very important, in fact, many computer issues are caused by the failure to update the device drivers in time. Many hardwares on our computers need drivers before they can be used normally. Generally speaking, the driver is the bridge between the operating system and the hardware. If the correct driver is not installed or the driver is not up-to-date, most of the hardwares and program applications can't run normally.
When we need to update our drivers in Windows?
When you add or update a new hardware device for your computer, you need to add or update the corresponding driver for it. When a hardware manufacturer introduces a new driver, or your current driver cannot run some software, such as games, you need to update the corresponding driver. When you reinstall the computer system for various reasons, you need to update the drivers of each hardware as soon as the system is installed. When your computer slows down or even crashes, you should also check whether you need to update some drivers.
How to update the drivers for your computer that running Windows 11/10/8.1/7?
Many experiences tell us that no matter what your computer issue is, you can basically solve it after updating the driver. Although Windows comes with a built-in tool called "Windows Update", Windows often thinks that updating drivers is optional, thus ignoring this operation. In addition, it usually takes a long time for device manufacturers to update their drivers to "Windows Update". Therefore, in most cases, we can only update the driver manually. Next, we will show you the most simple ways to update your drivers in Windows 11/10/8.1/7.
- Part 1. Automatically update your drivers in Windows 11/10/8.1/7 with Windows Driver Manager
- Part 2. Manually & automatically update your drivers in Windows 11/10
- Part 3. Manually update your drivers in Windows 8.1
- Part 4. Manually update your drivers in Windows 7
- Part 5. Recover deleted and lost files on your computer
Part 1. Automatically update your drivers in Windows 11/10/8.1/7 with Windows Driver Manager
Windows Driver Manager is an all-in-one master of driving management, which provides the best solution to all driver related problems for Windows 11/10/8.1/7. With the help of this program, you can easily update all your drivers with just 1 click. More important, you don’t have to know anything about your computer, Windows Driver Manager will automatically recognize your system and all your devices, and update all the latest certified drivers for you.

Supported Devices: Audio Devices, Graphic Cards, Network/Ethernet Cards, Wi-Fi Cards, Chipsets, Printers, USB Devices, Bluetooth Devices, PCI Cards, Modems, CD/DVD Drives, Scanners, game handle, and so on.
Step 1: Download, install and run the Windows Driver Manager software on your computer.
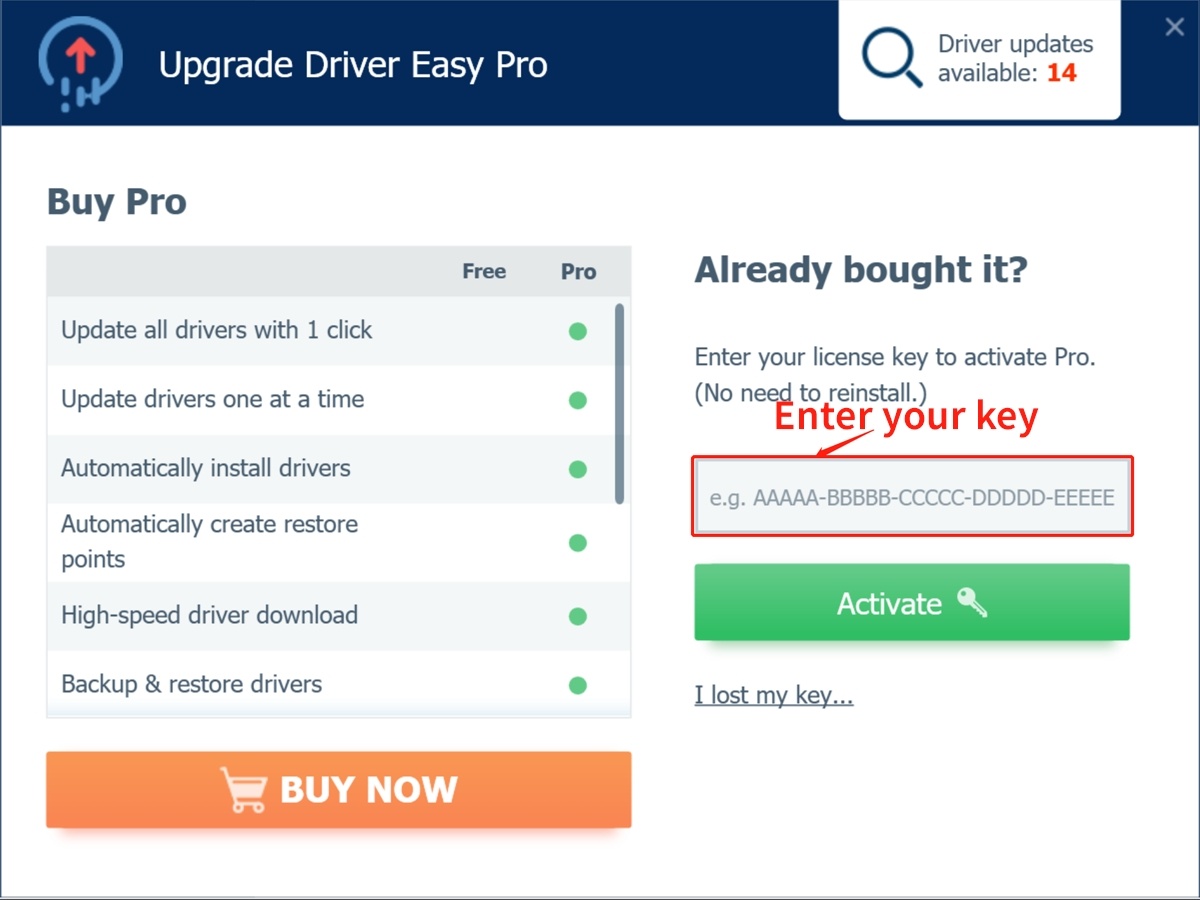
Step 2: Tap on "UPGRADE" to upgrade the software to the Pro version as that you can use it completely without restriction.

Step 3: Follow the on-screen prompts to activate the Pro version.
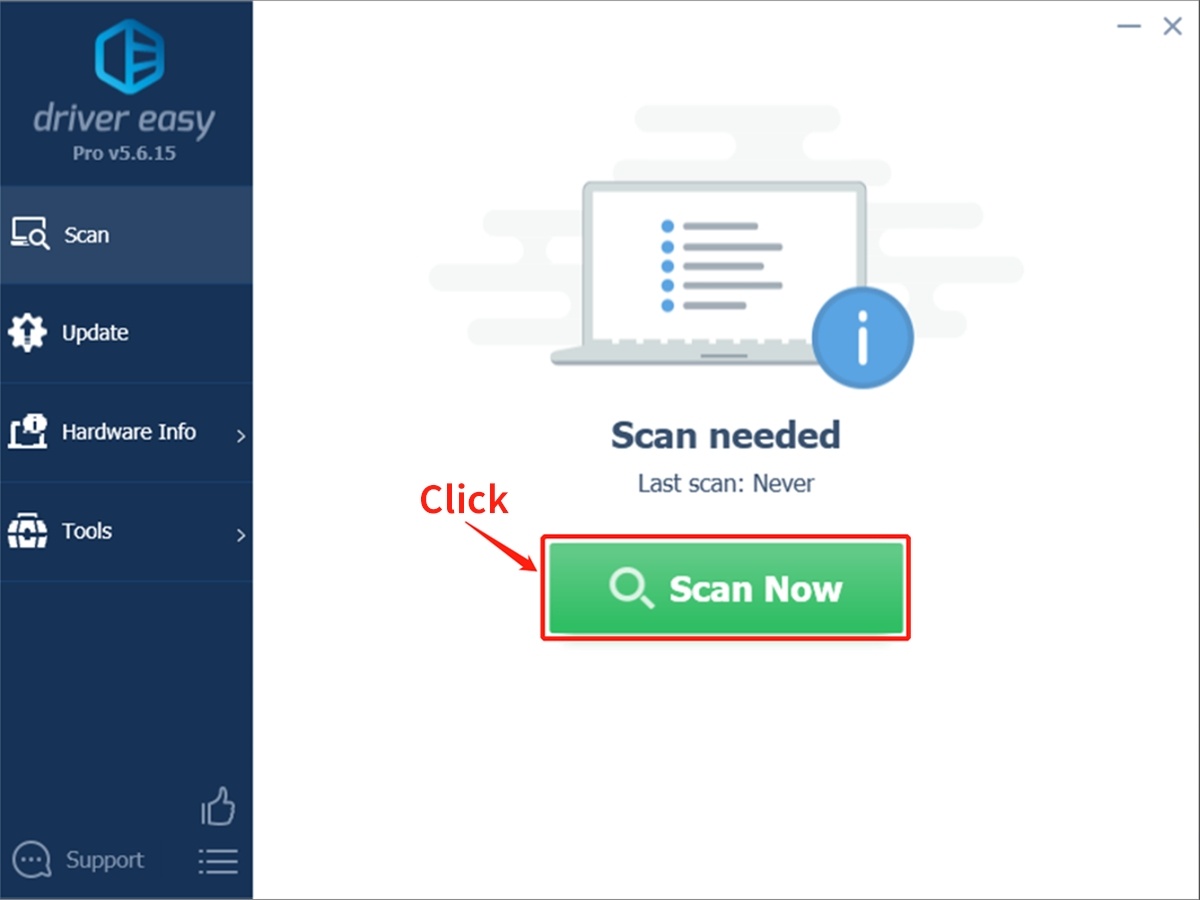
Step 4: After that, you are allowed you to click "Scan Now" button to begin to scan your computer and detect any devices with missing or outdated drivers.
Step 5: Wait for the scan to complete, all the devices that need to update their drivers will be listed, you can scroll down to view all of them and update any of them one by one as your need. Generally speaking, you just need to click "Update All", the program will automatically download and install all the drivers for you.
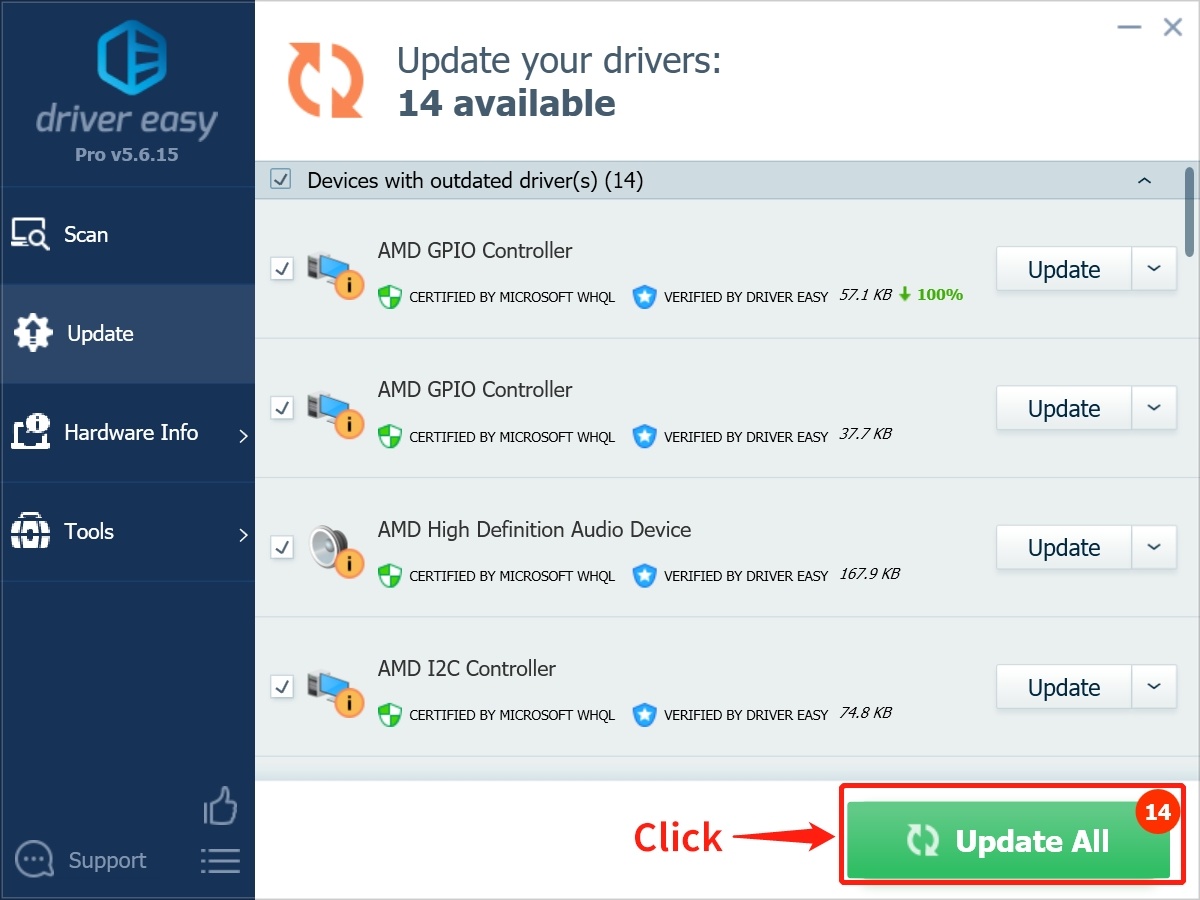
Note: Please wait patiently for all updates to be completed. Please do not power off or restart your computer in the process. After all the updates are completed, please restart your computer according to the prompts to completely configure some drivers.
Part 2. Manually & automatically update your drivers in Windows 11/10
For the computer that is running Windows 11 or Windows 10, you can manually & automatically update your drivers by following the below steps.
Method 1. Update your drivers using Windows Update
Step 1: Open "Settings" and tap on "Update & Security" on your computer.
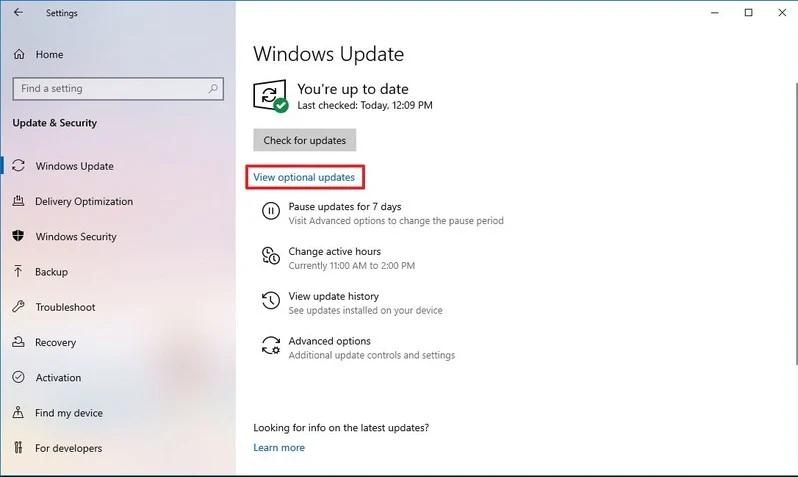
Step 2: Click on the "Windows Update" option.
Step 3: Tap on "Check for updates" > "View optional updates" > "Driver updates".
Step 4: Now, please select the driver you'd like to update.
Step 5: Click on the "Download and install" button to begin updating the latest version of driver for your device.
Method 2. Update your the drivers for your devices
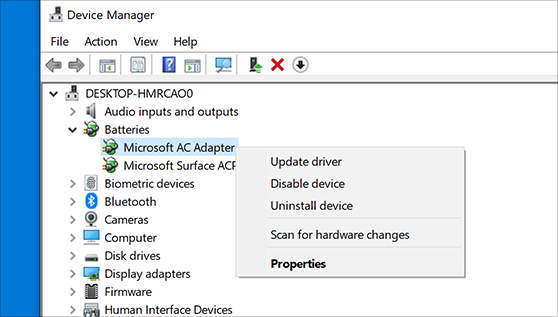
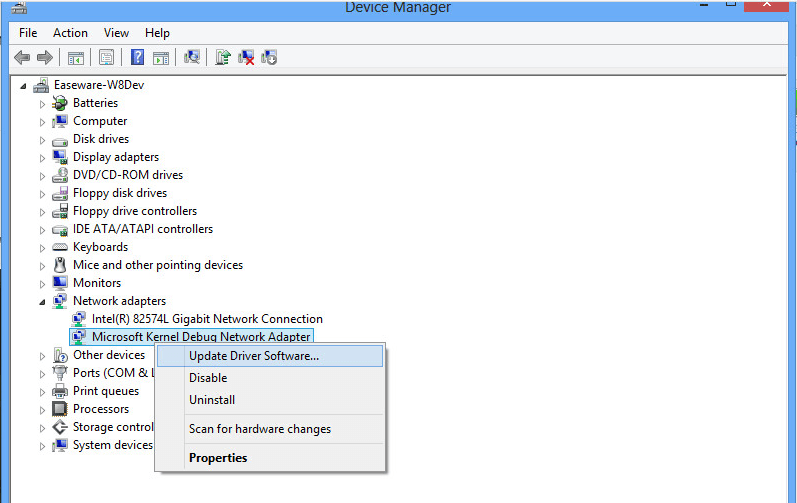
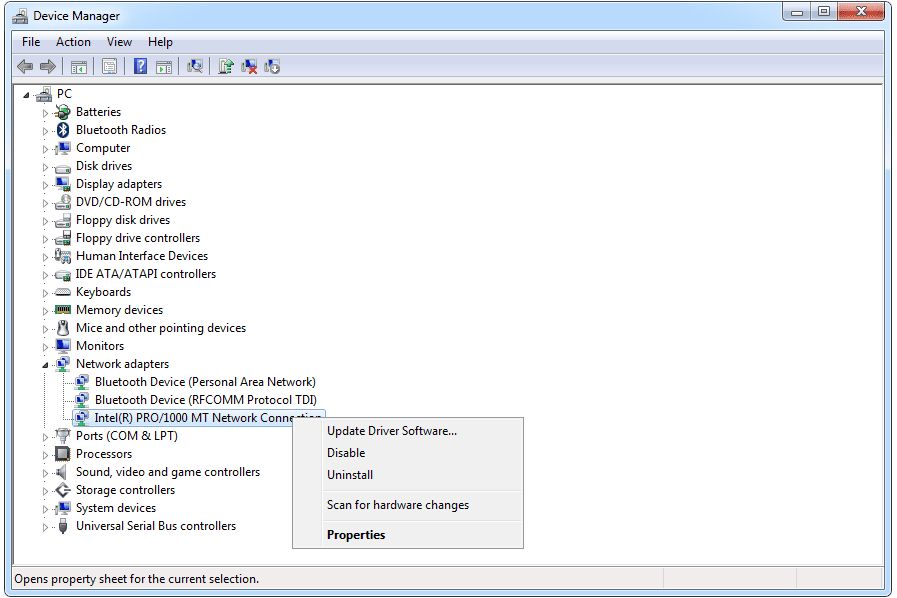
Step 1: In the search box on the taskbar, enter device manager, and select "Device Manager" among all the search result.
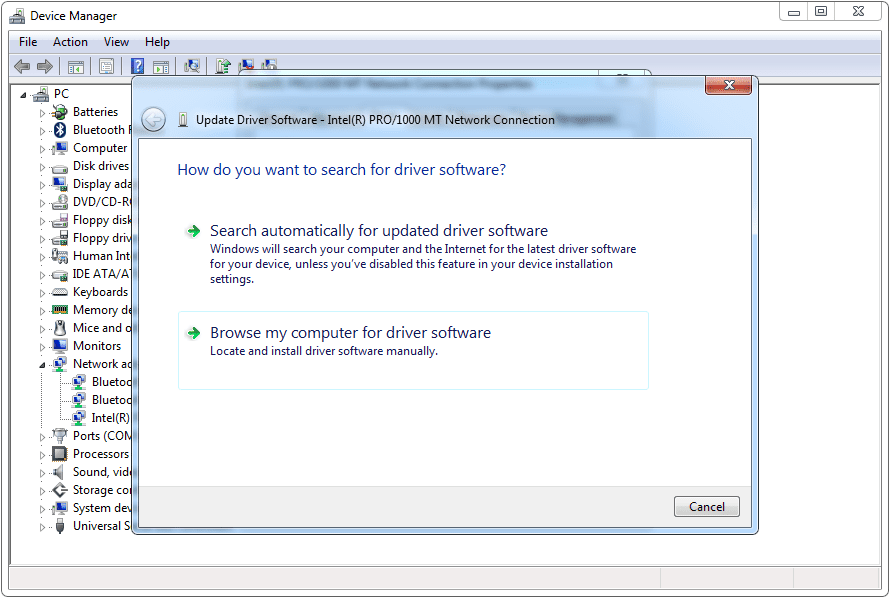
Step 2: As you can see, all the devices of your computer will be listed, you can click a category to see drivers of devices, then right-click the one you'd like to update.
Step 3: Click on "Search automatically for updated driver software".
Step 4: Tap on "Update Driver".
Tip: If Windows can not find a new driver, you can try looking for the website of the corresponding device manufacturer and follow their instructions to download and install the latest version of driver.
Method 3. Reinstall the drivers for your devices
Step 1: In the search box on the taskbar, enter device manager and select "Device Manager" among all the options.
Step 2: Right-click the name of the device that you'd like to update its driver, and select "Uninstall".
Step 3: After that, please restart your computer.
Step 4: Windows will attempt to reinstall the driver.
Part 3. Manually update your drivers in Windows 8.1
For the computer that is running Windows 8.1, you can manually update the drivers for your devices by following the below steps.
Note: Before using this method, you must be signed in as an administrator to follow these steps.
Step 1: Click "Search" on the edge bar on the right side of the screen.
Step 2: Please enter "Device Manager" in the search box, and select "Device Manager" among all the items.
Step 3: Double-tap or double-click the category where your device is in, then double-tap or double-click the device you'd like to update the driver for.
Step 4: Tap or click the "Driver" tab, tap or click "Update Driver", and then follow the instructions to begin to download and install the corresponding driver.
Part 4. Manually update your drivers in Windows 7
For the computer that is running Windows 7, you can manually update the drivers for your devices by following the below steps.
Step 1: Press and hold the "Start" button on the taskbar, then enter "device manager" in the search box and select "Device Manager".
Step 2: As you can see, all the devices of your computer will be listed, you can click to view the corresponding drivers of the device that you'd like to update.
Step 3: Right click the driver that you wish to update, then click the "Update Driver" option and follow the prompt to start updating the driver for your device.
Part 5. Recover deleted and lost files on your computer
In the process of daily use of computers, you will inevitably encounter some system problems or delete them by mistake, which will cause you to lose some important computer data, such as pictures, videos, audio, documents, emails and so on. In fact, to recover the deleted and lost files on your Windows computer, you just need the help of Best Data Recovery.
Best Data Recovery is a professional and secure data recovery software that allows you to recover deleted/lost files like photos, pictures, images, documents, emails, audio, videos and more from your computer, mobile phone, hard drive, flash drive, memory card, digital camera, etc.. With the help of this program, you can easily restore your data no matter they lost due to accidentally deletion, formatted partition, hard drive problem, RAW hard drive, crashed computer and other unknown reason.
Step 1: Download, install, and run Best Data Recovery on your computer.
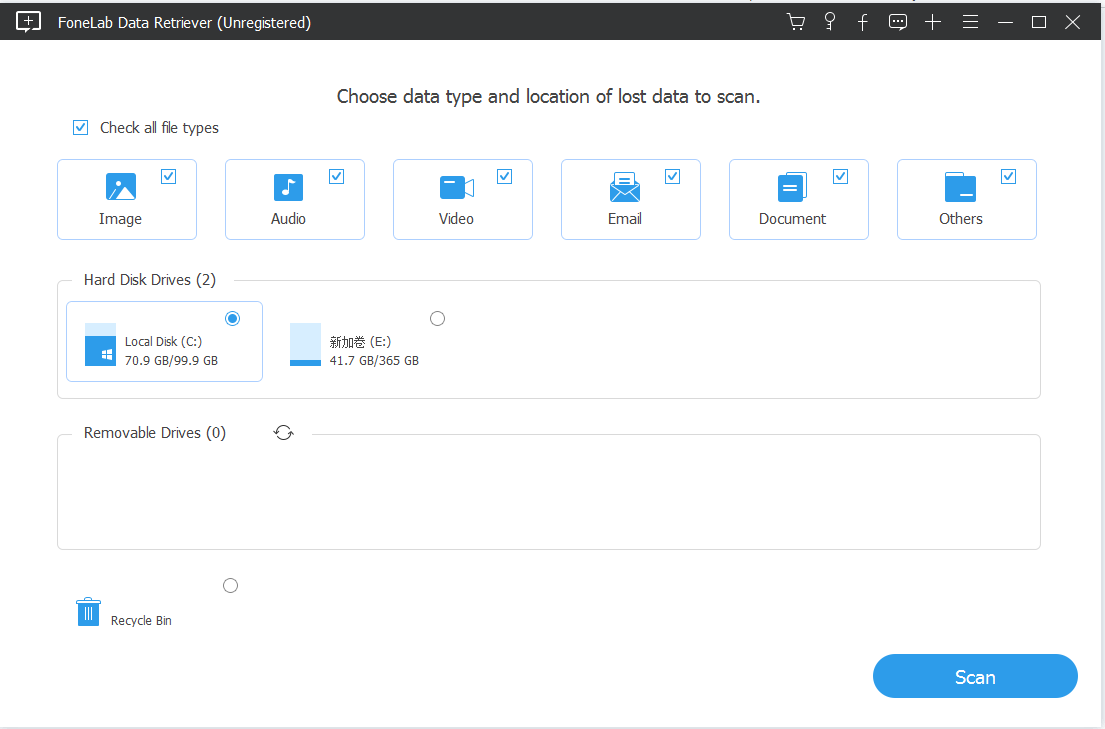
Step 2: Select the file type(s) you need to recover on the software's page, such as images, audio, video, document, etc. Then select the disk you used to save the missing file. and click on "Scan" to begin scanning for the lost contents.
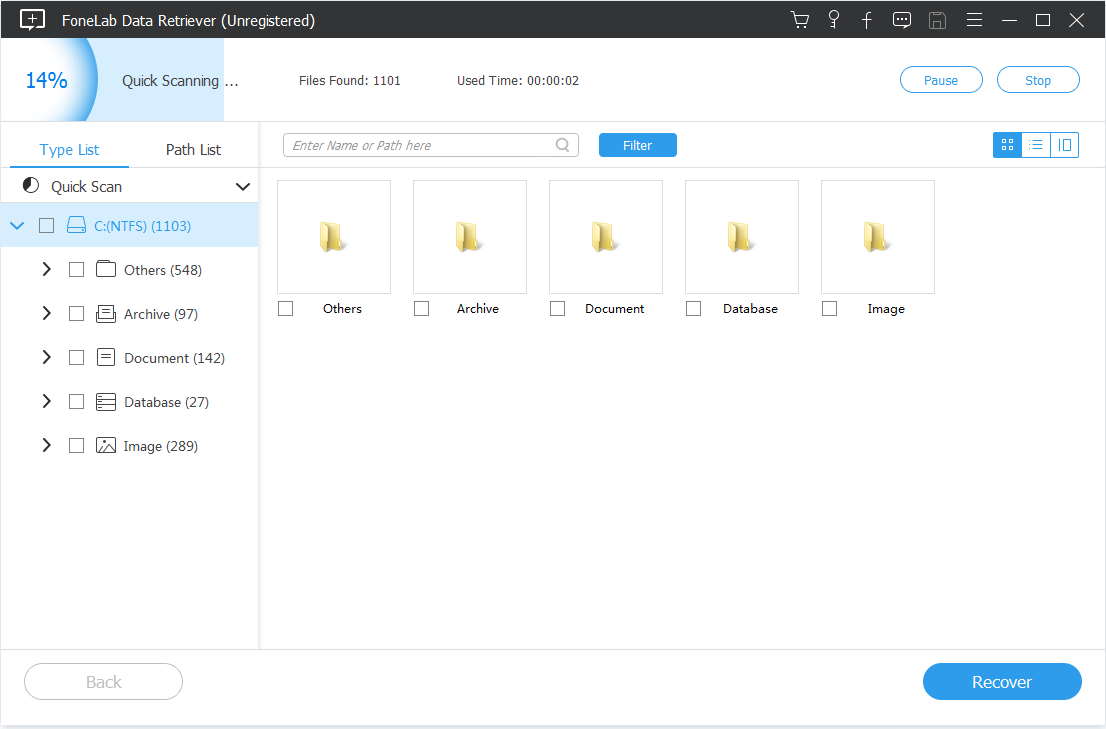
Step 3: On the page you can preview all the data scanned in the previous step. Select the data you need to recover, and then click "Recover" to save the selected data back to your computer.
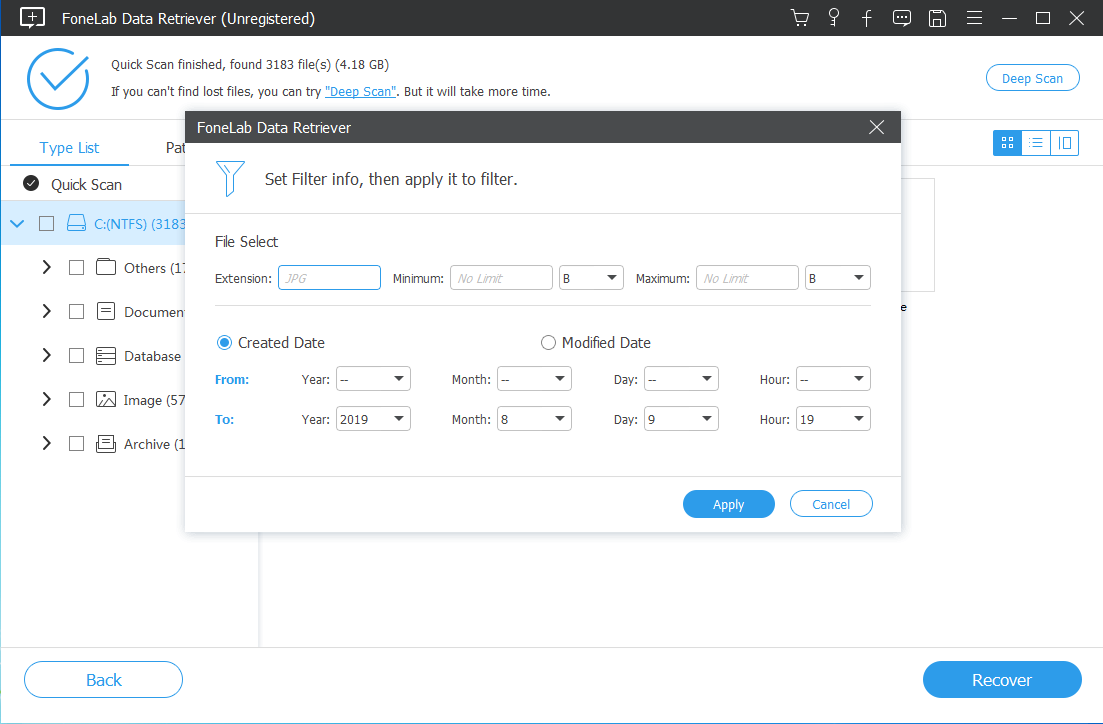
Tip: If you can not find the files as you need, please don't worry, click on "Deep Scan" to try it again, which will scan out more files.


